Follow the process below to upload boundaries to a Company
-
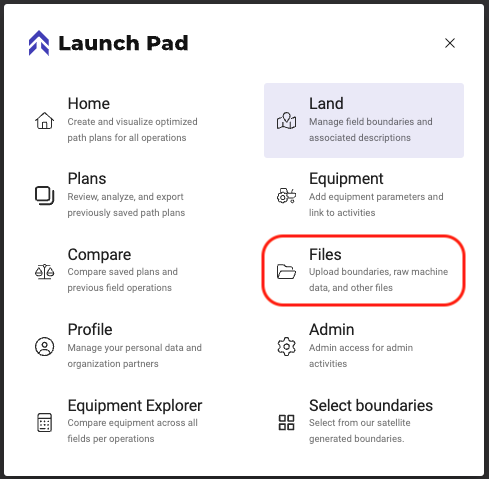
Click on Menu
-
Choose “Files”
-
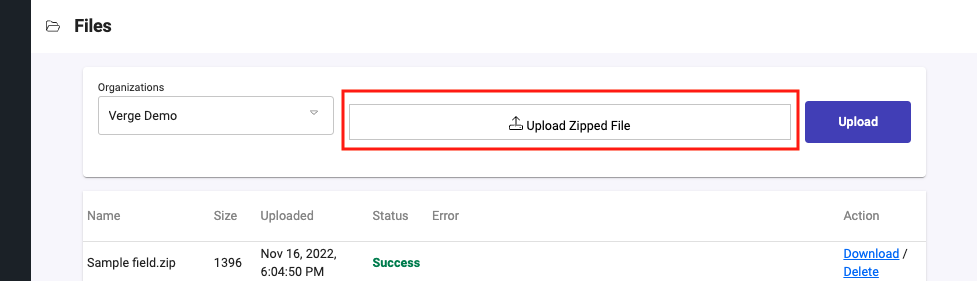
Click in the box that states “Upload Zipped File”
-
Choose the Shapefile to be loaded in
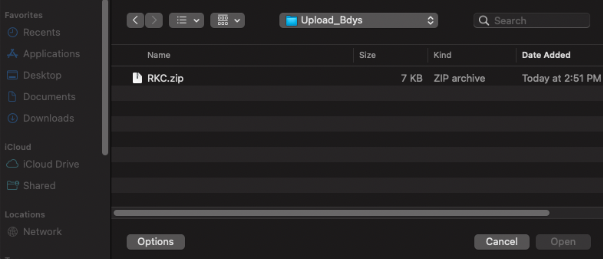
Screen may vary depending on type of computer (Apple or PC)
- Check that the Shapefile is configured correctly by looking at the examples below in the section Labeled “Accepted Formatting of the Shapefiles”
-
Once you have selected the zipped shapefile the Upload button will be active

-
Click Upload
-
The file will show in the list and will display a status of Success, Error, or Completed with Errors
-
Completed with Errors: Partial success. There were some fields that were not loaded in due to invalid Boundaries

-
Error: No Records Recognized

-
Success: All Records Recognized and Processed

-
-
Accepted Formatting of the Shapefiles:
Limitations
**There are currently no limitations for file size or number of columns**
-
LineStrings or MultilineStrings are not supported. We consider that the Boundary must be a closed polygon to be recognized as valid.
-
Files that do not match our accepted Attribute headers
File compression accepted for upload
Field geometry must be uploaded as ESRI Shapefiles compressed as a ZIP. Nested .zip files are supported as long as there is not a directory within the structure. See supported examples below:
| Example 1 | Example 2 | Example 3 |
|---|---|---|
Attribute header names supported
NOTE: If the file only contains a Field name we will still accept the boundaries and automatically name the Grower and Farm with the Organization Name.
-
Grower:
- "growername", "grower_name", "grower name", "grower", "clientname", "client_name", "client name", "client", "customername", "customer_name", "customer name", "customer", "businessnam", "business_nam", "business"
-
Farm:
- "farmname", "farm_name", "farm name", "farm"
-
Field:
- "fieldname", "field_name", "field name", "field", "name", "ID"
Any name not included above will not be recognized.
The order of the names in the list sets their priority.
ISO 11783-10 XML (Taskdata)
We support uploading of ISO 11783-10 (TASKDATA) files including ISO11783LinkList. To avoid difficulties with your upload, please ensure any ISO11783LinkList file sets are in their own directory.
As ISO 11783-10 formatted xml files follow a common standard, they should have grower, farm, and field data inserted automatically by the tool that generated the file. We use the “CustomerLastName” name for the Grower name, the “FarmDesignator” for the Farm name, and the “PartfieldDesignator” for Field names automatically. Boundary names are taken from the “PolygonDesignator” if it is provided. However, as this is not always included by third party software, if it is not provided we will fall back to using the field name with “_boundary” appended.
Similar to Shapefile uploads, if the same Grower, Farm, Field, Boundary, already exist then a new variant will be loaded and made available in the Launch Pad UI.
KML
Use the same default naming scheme as Shapefiles which are always necessary for Grower and Farm names since KML files do not really support the GFFB concept. Field names will use the name of the KML placemark that the geometry data was read from or fallback to the same scheme as used in Shapefiles if it was not found in the file (the default is the company name followed by the name of the KML file it was found within).