This guide walks you through loading a Path Plan onto a Trimble GFX-1260 monitor: transfer the field data from a USB drive, select the field in Precision-IQ, and activate the guidance lines for navigation. Follow the steps in order. Prefer to watch? The full video walkthrough is below.
Preparation: data transfer
-
Insert the USB drive in the back of the monitor. Locate the USB port on the back of the Trimble monitor and insert the drive that holds your project data.

-
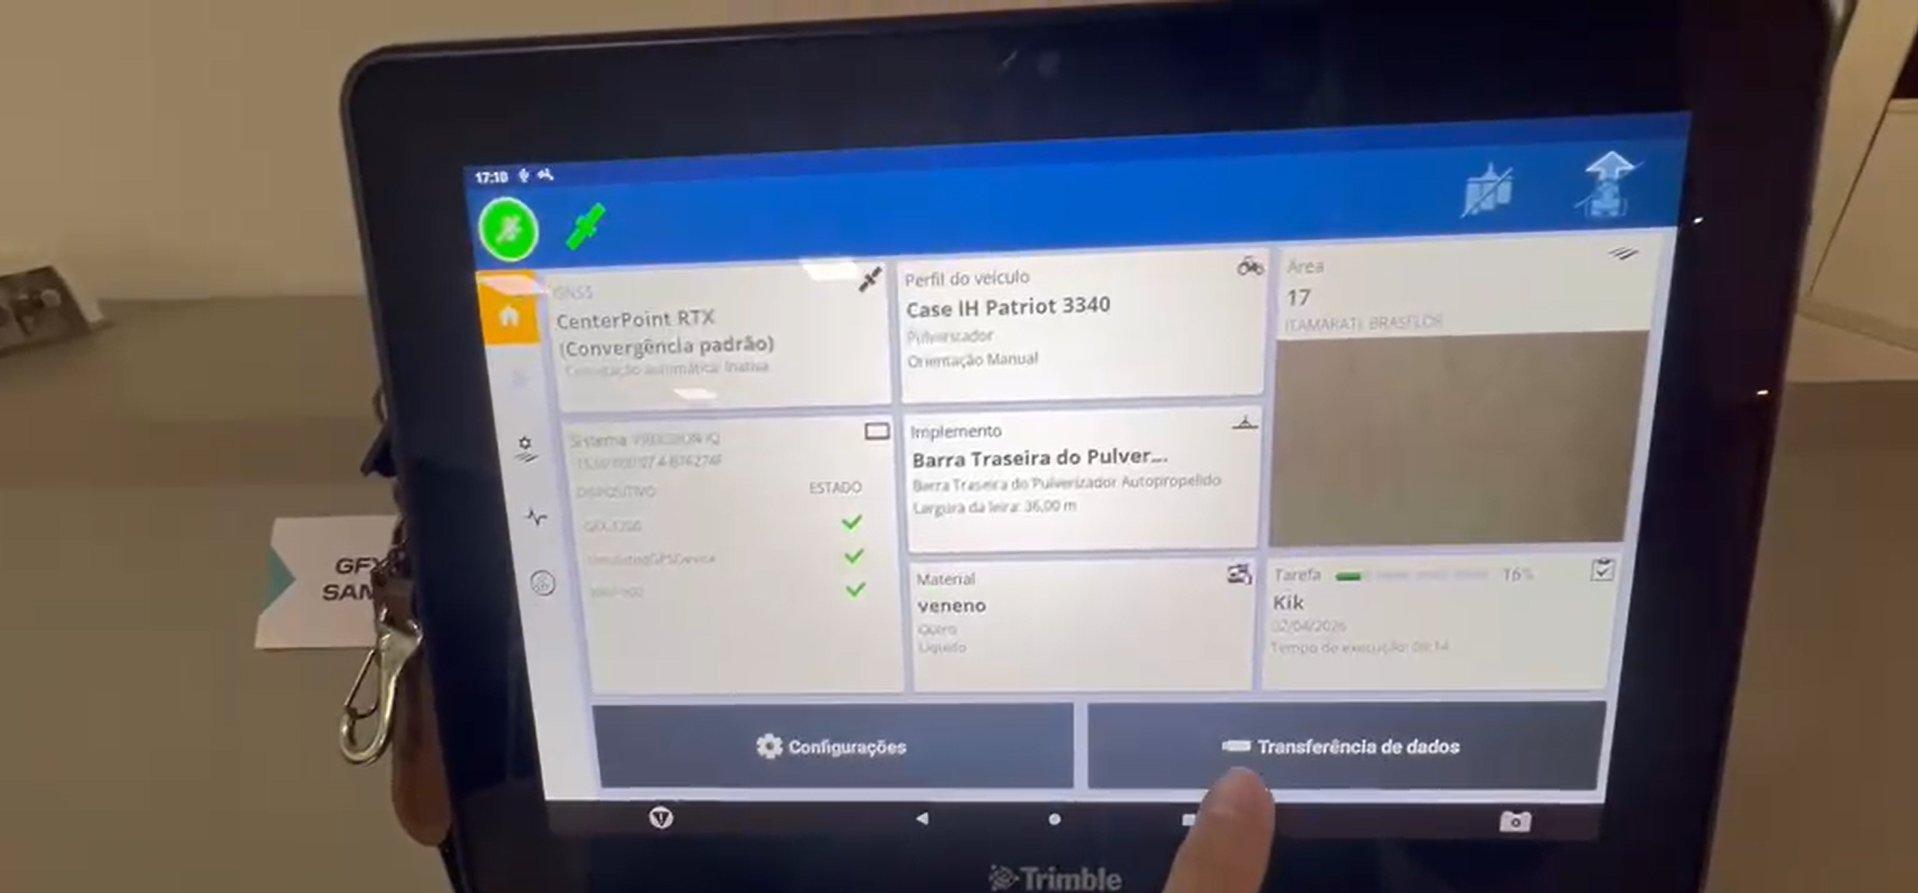
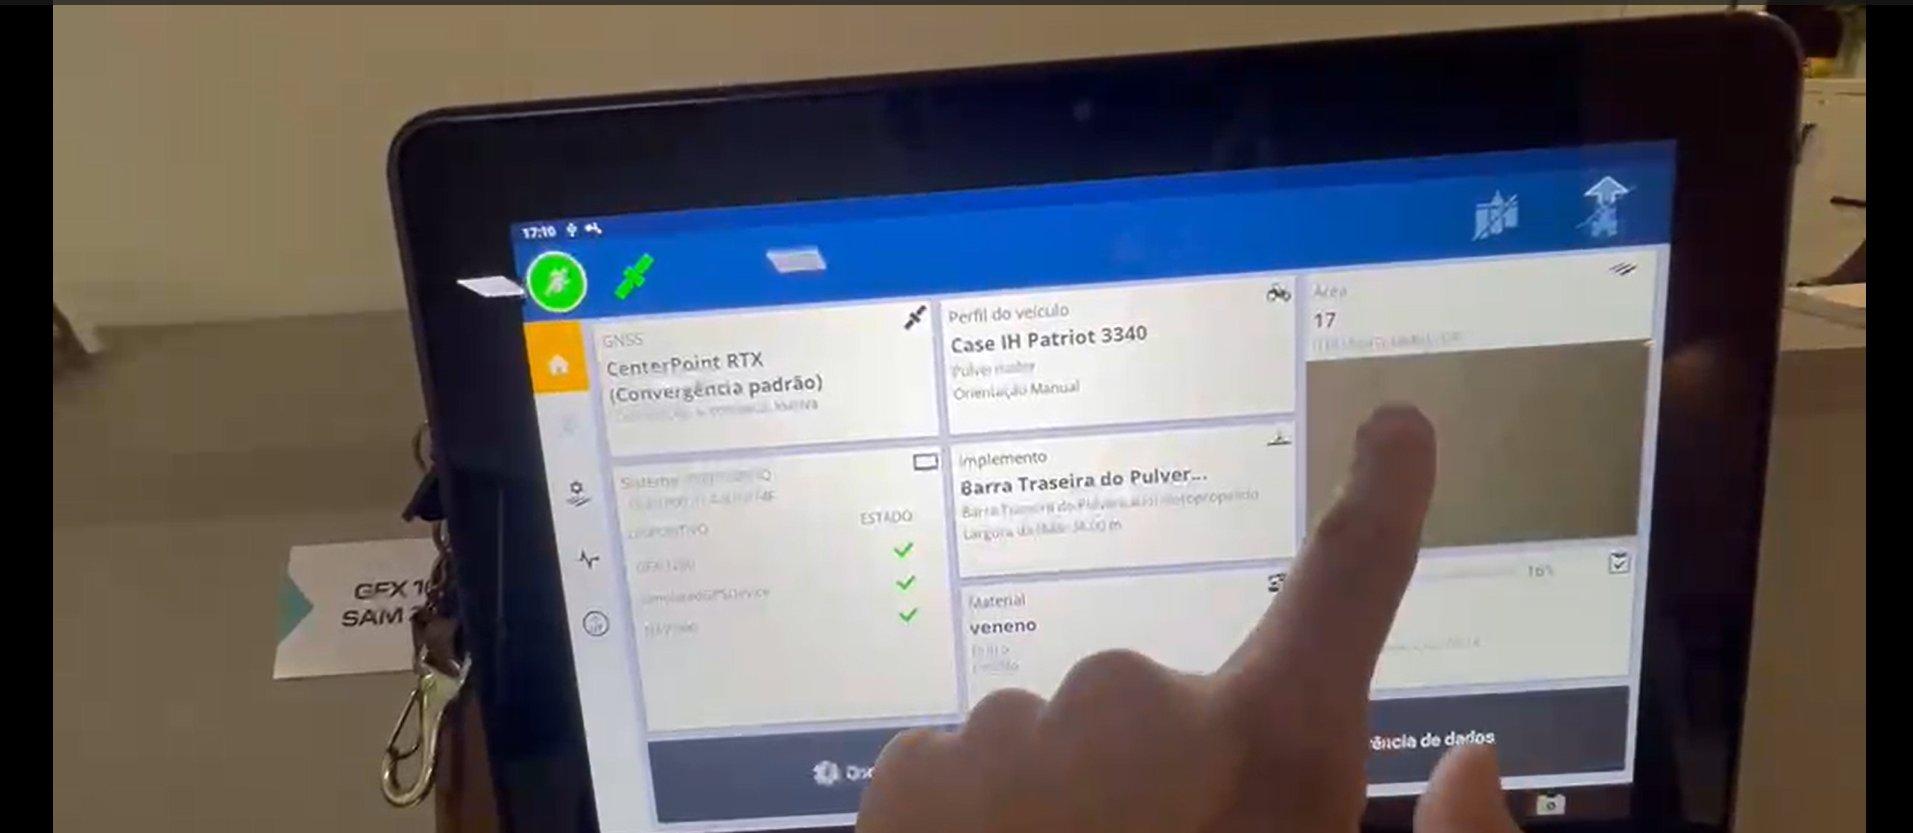
Tap Data Transfer. On the home screen, tap Data Transfer (bottom-right button).
-
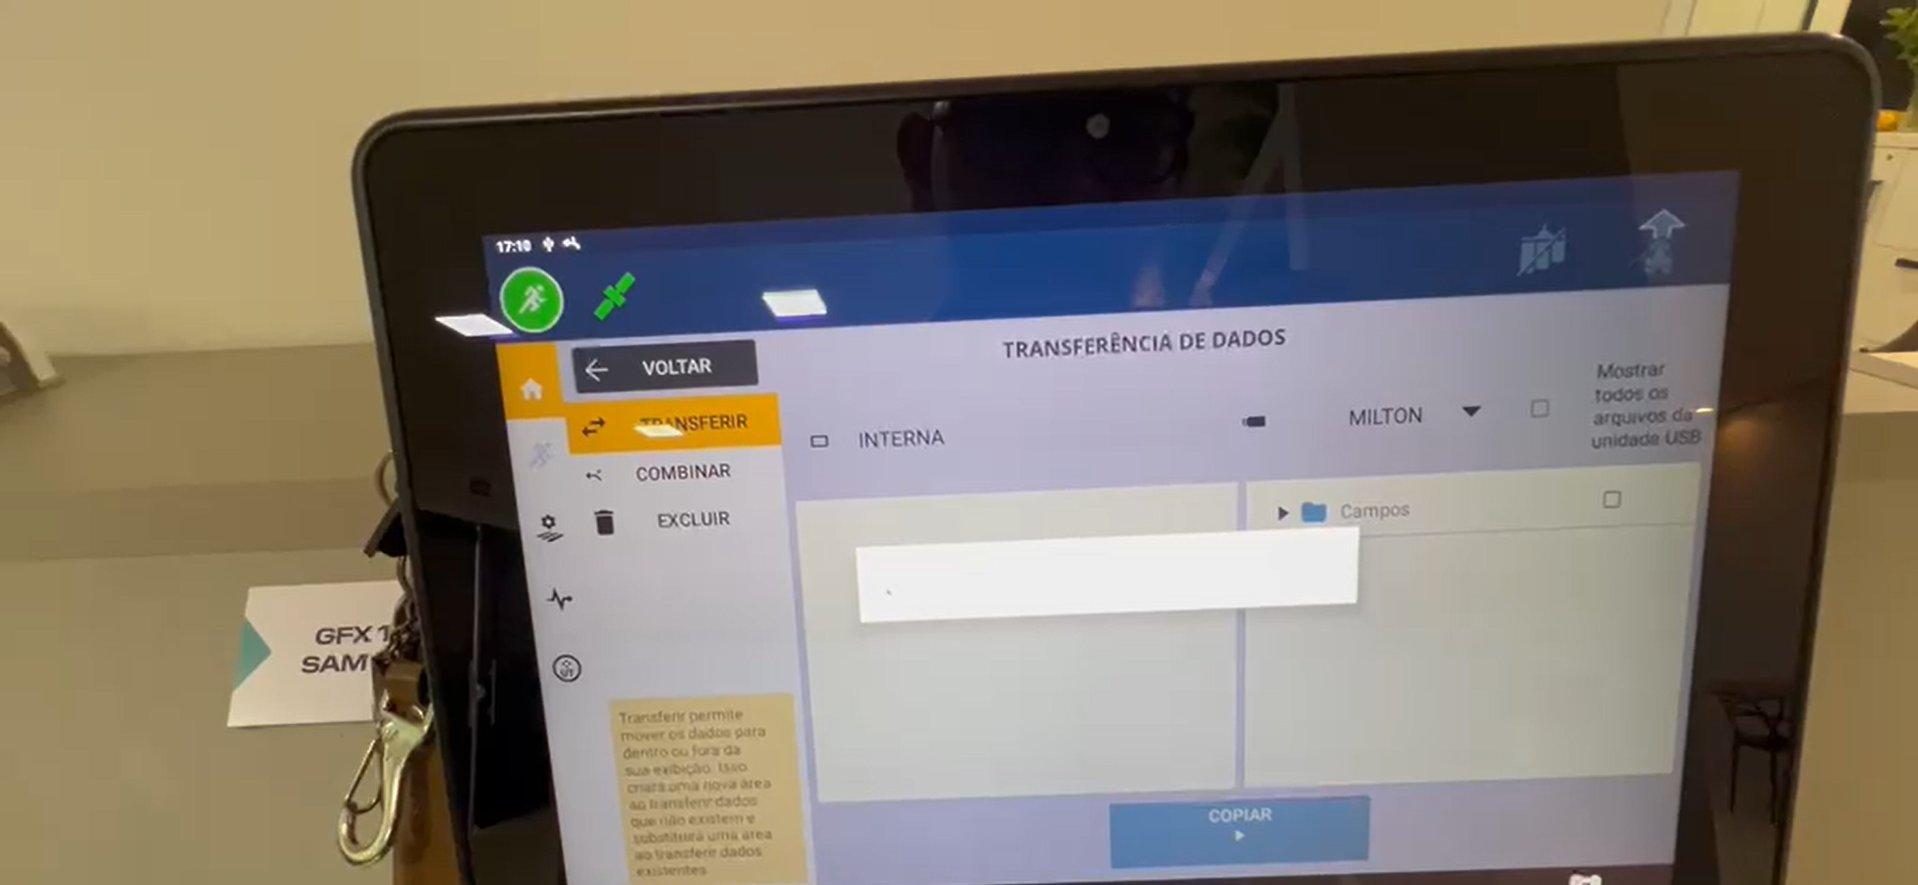
Wait for it to load. The Data Transfer screen opens. Wait for the system to recognize the USB drive.
-
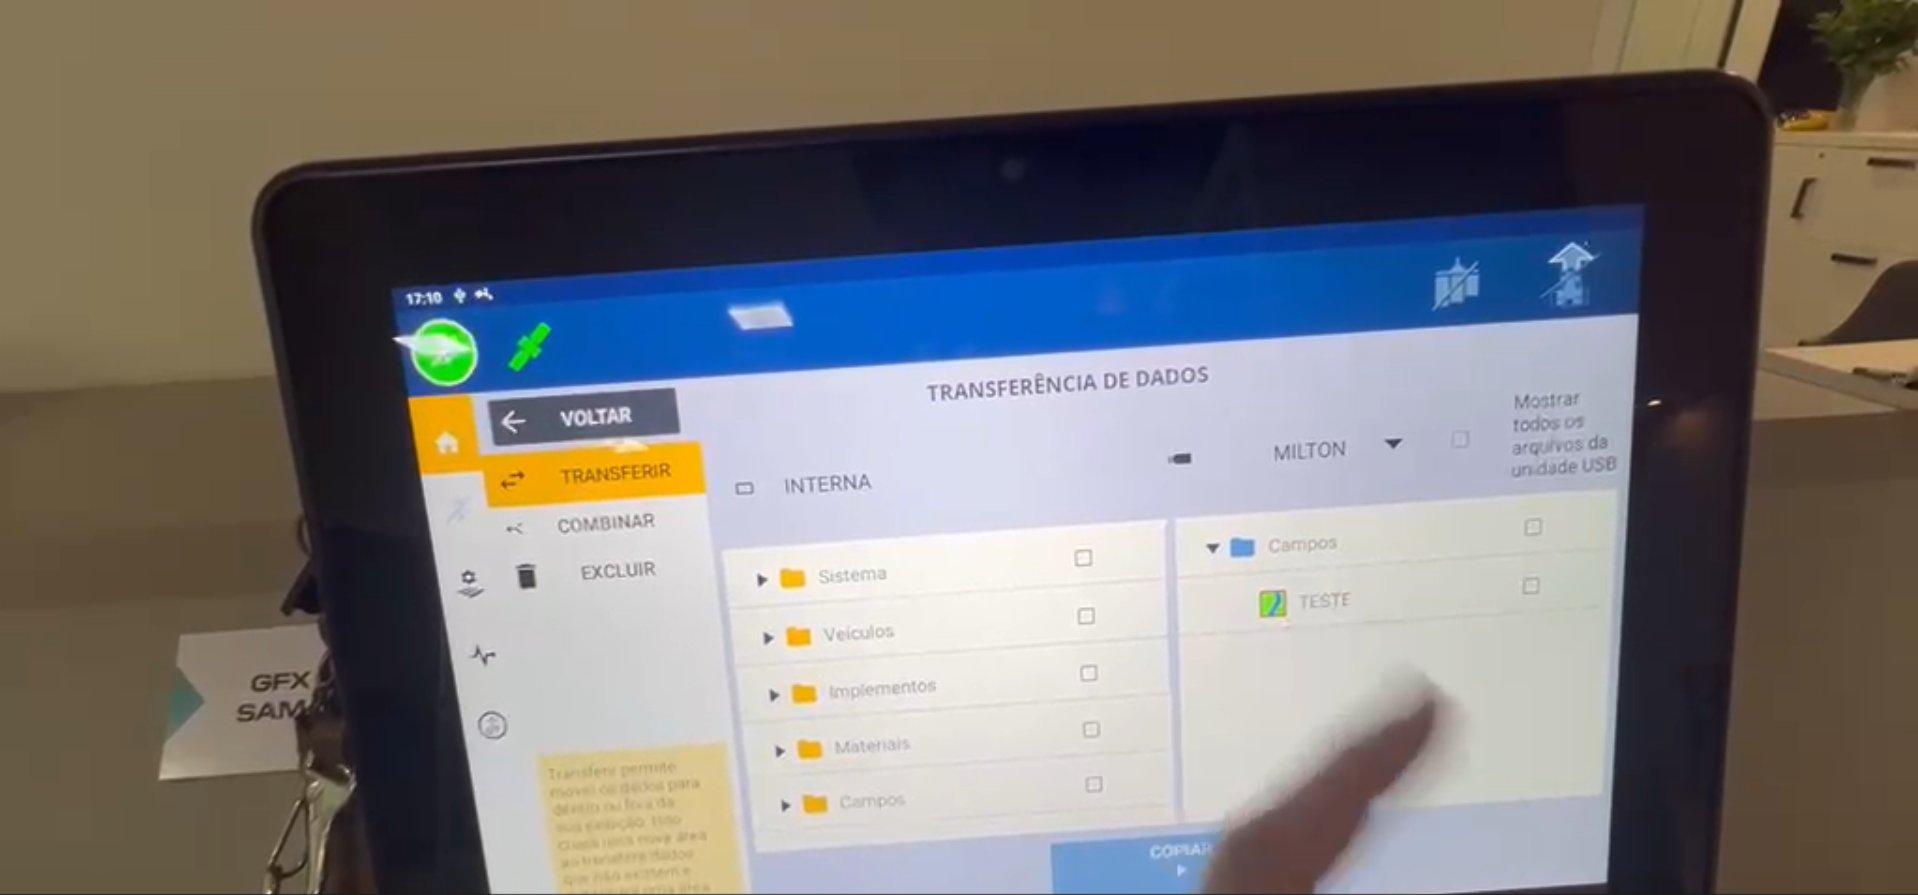
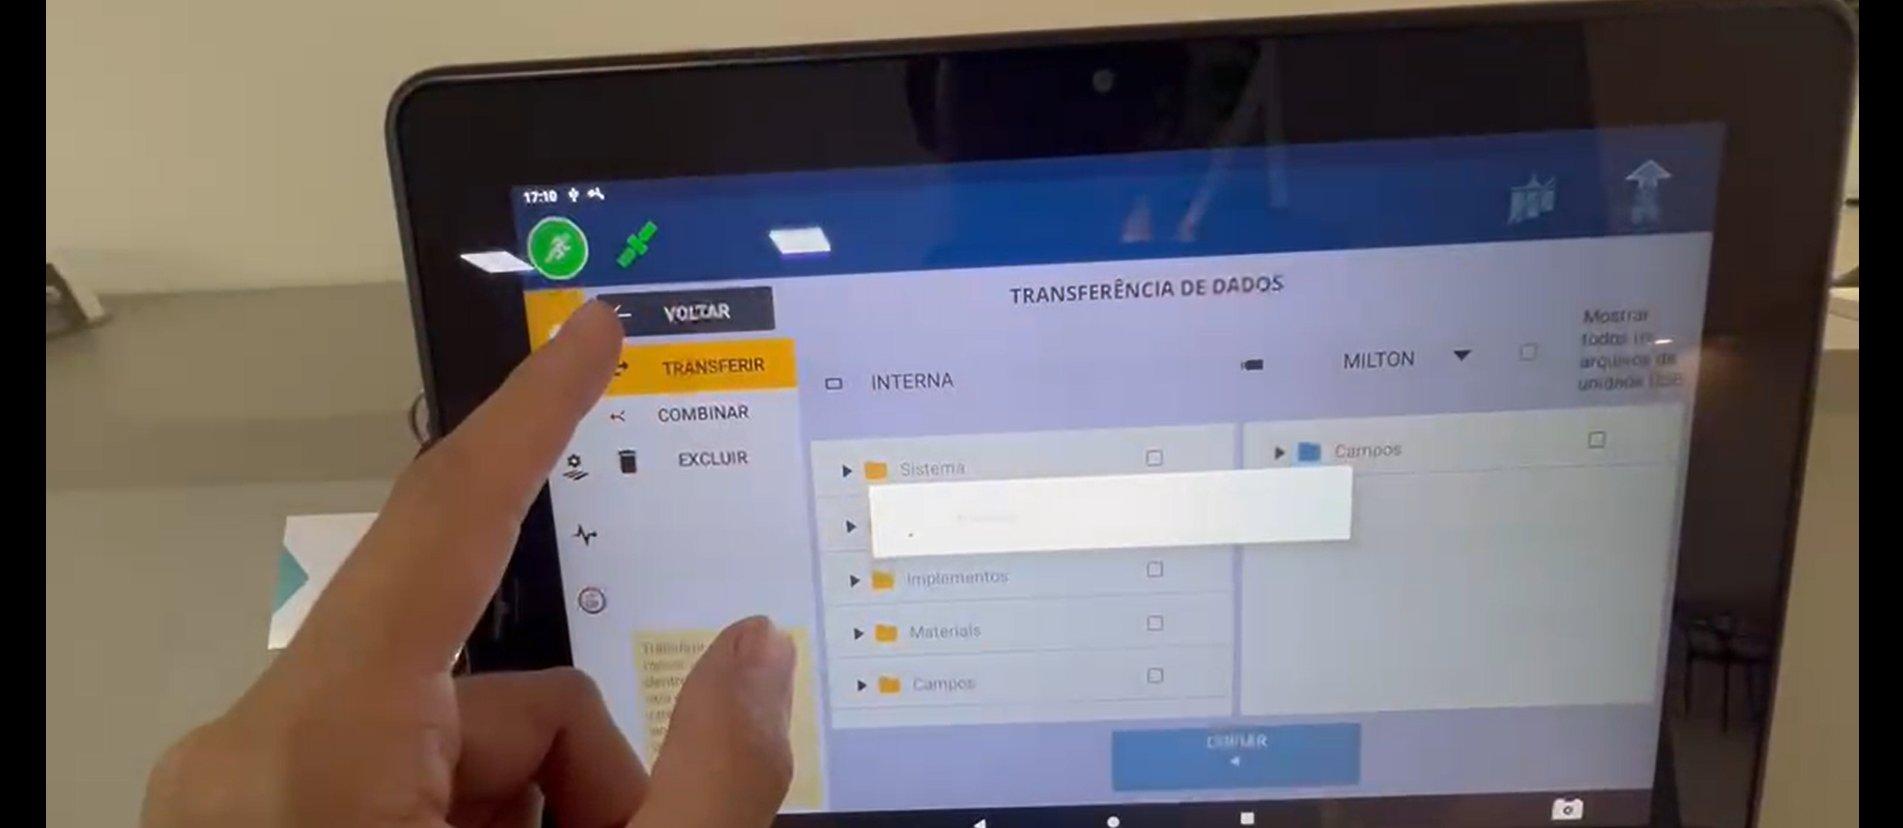
Your USB files appear on the right. The files from your USB drive are listed on the right side of the screen. Find the Fields folder and the field you want.
-
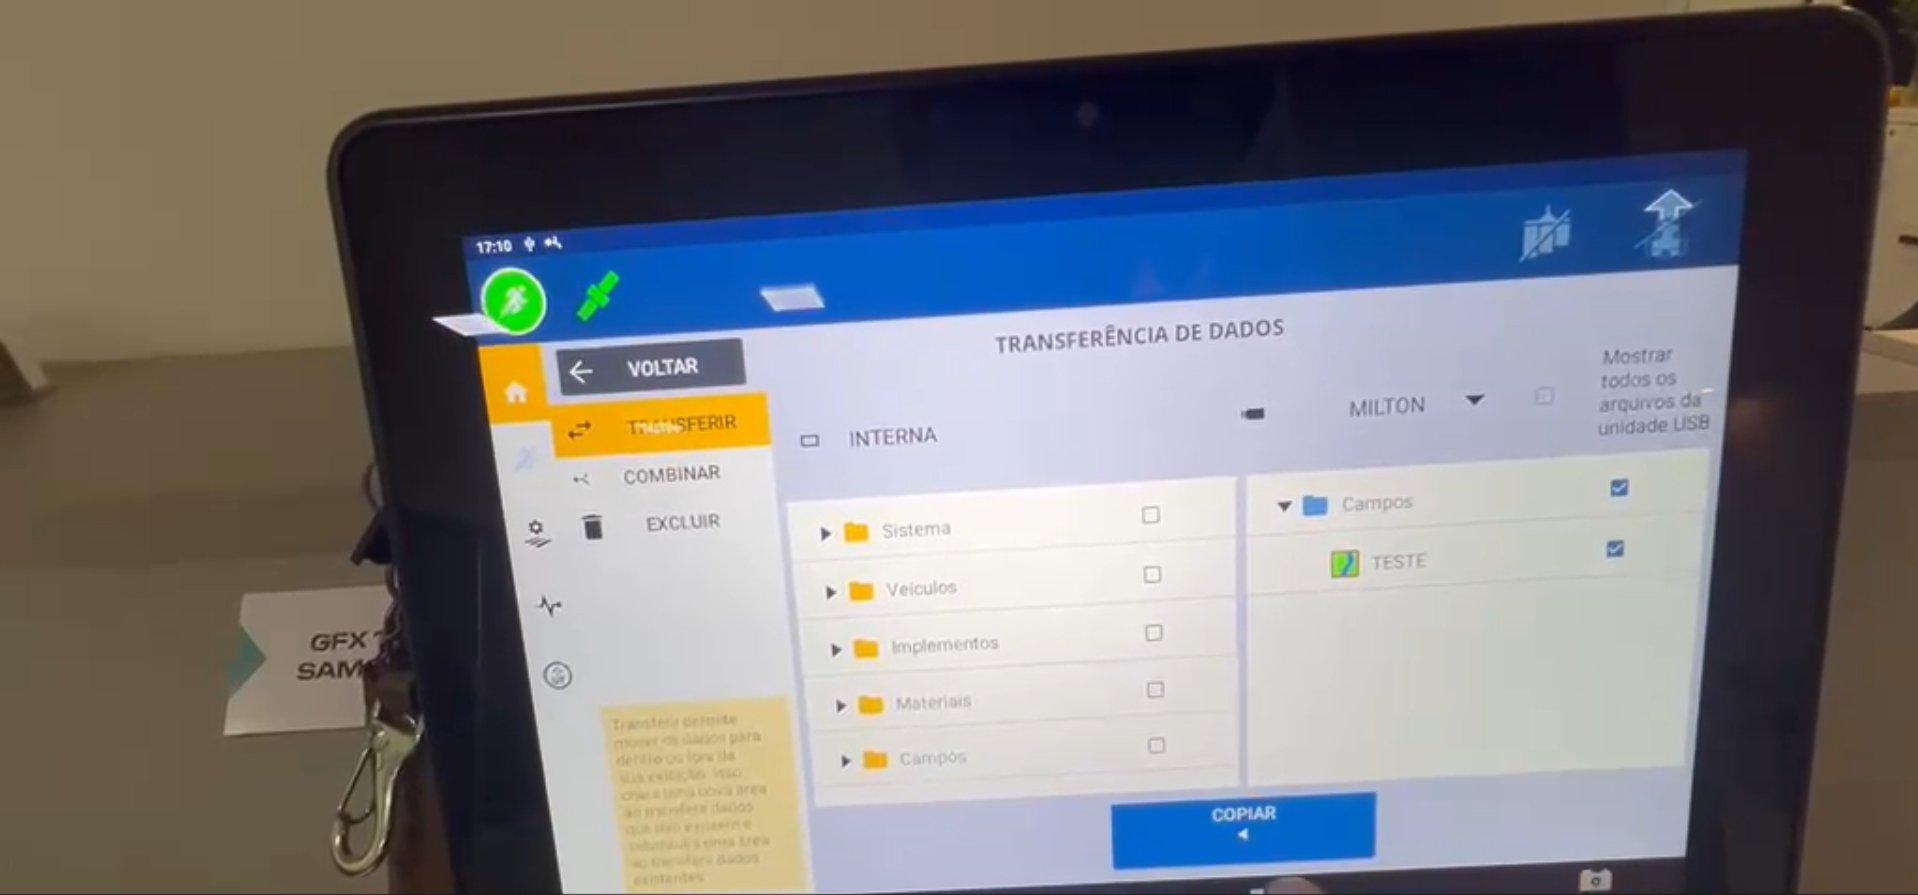
Select the field and tap Copy. Check the field file on the right (USB) side, then tap COPY to transfer it to the monitor's internal storage.
-
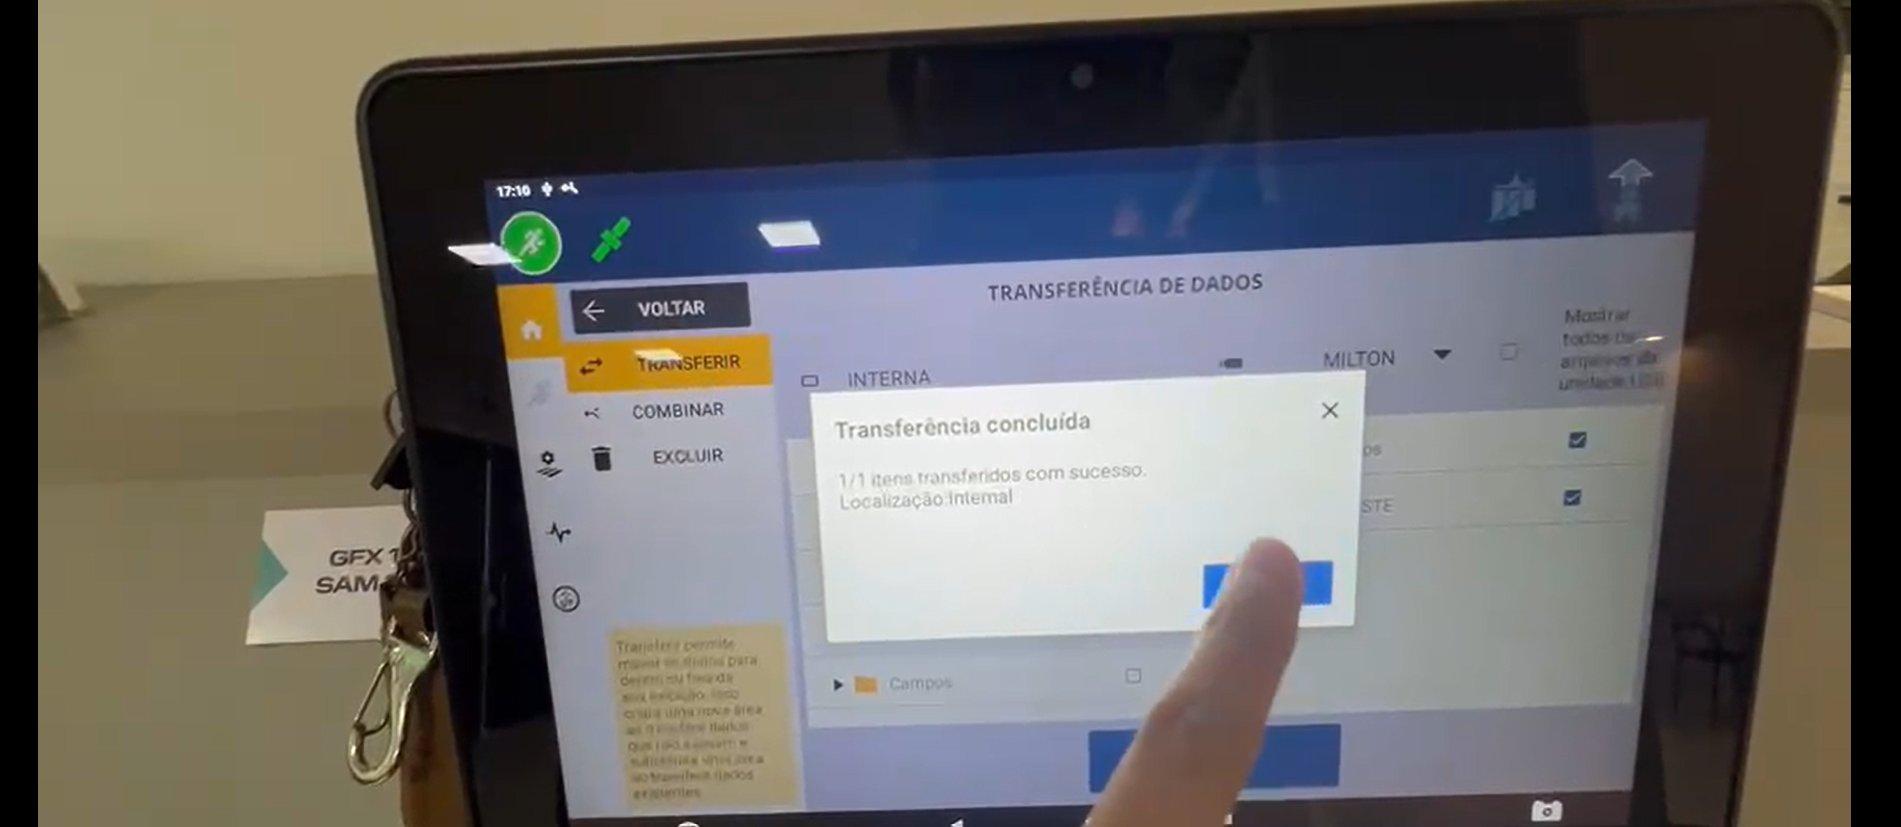
Wait for it to finish and tap OK. Wait for the "Transfer complete" message, then tap OK to confirm.
-
Tap Back. Tap BACK to return to the home screen.
Set up the work area
-
Tap Area. On the home screen, tap the Area tile to open the field manager.
-
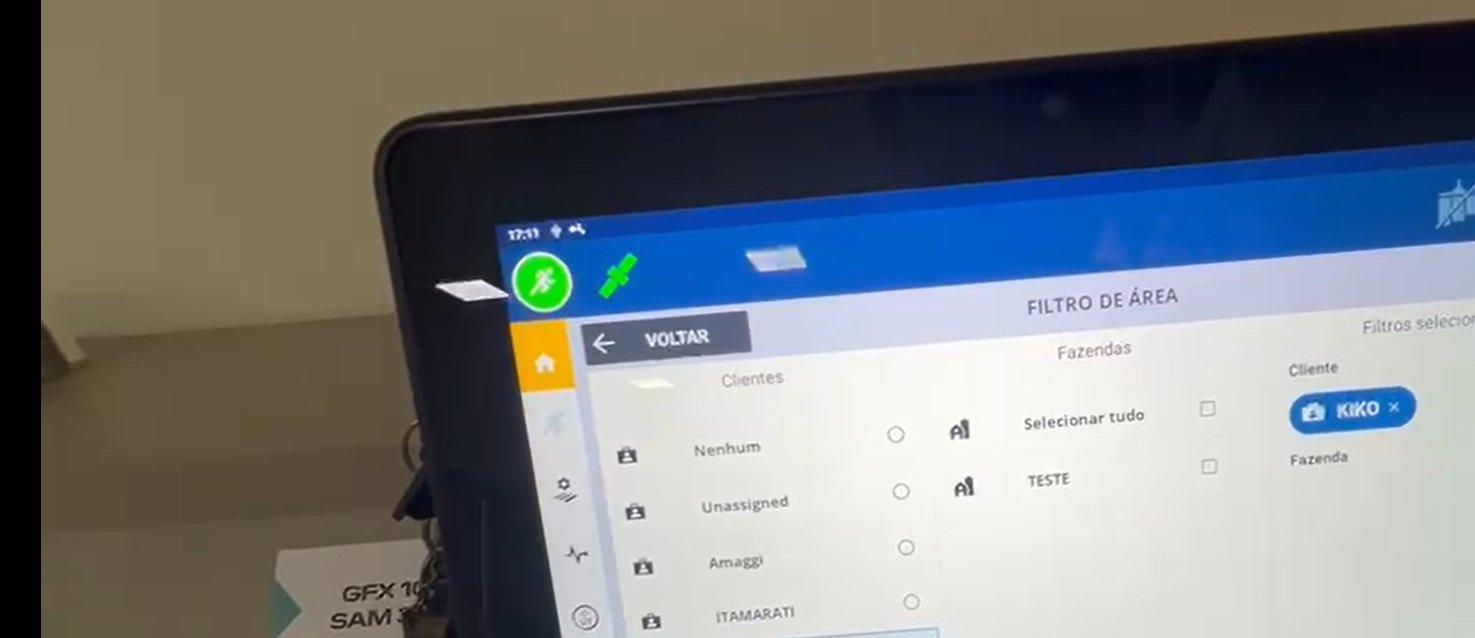
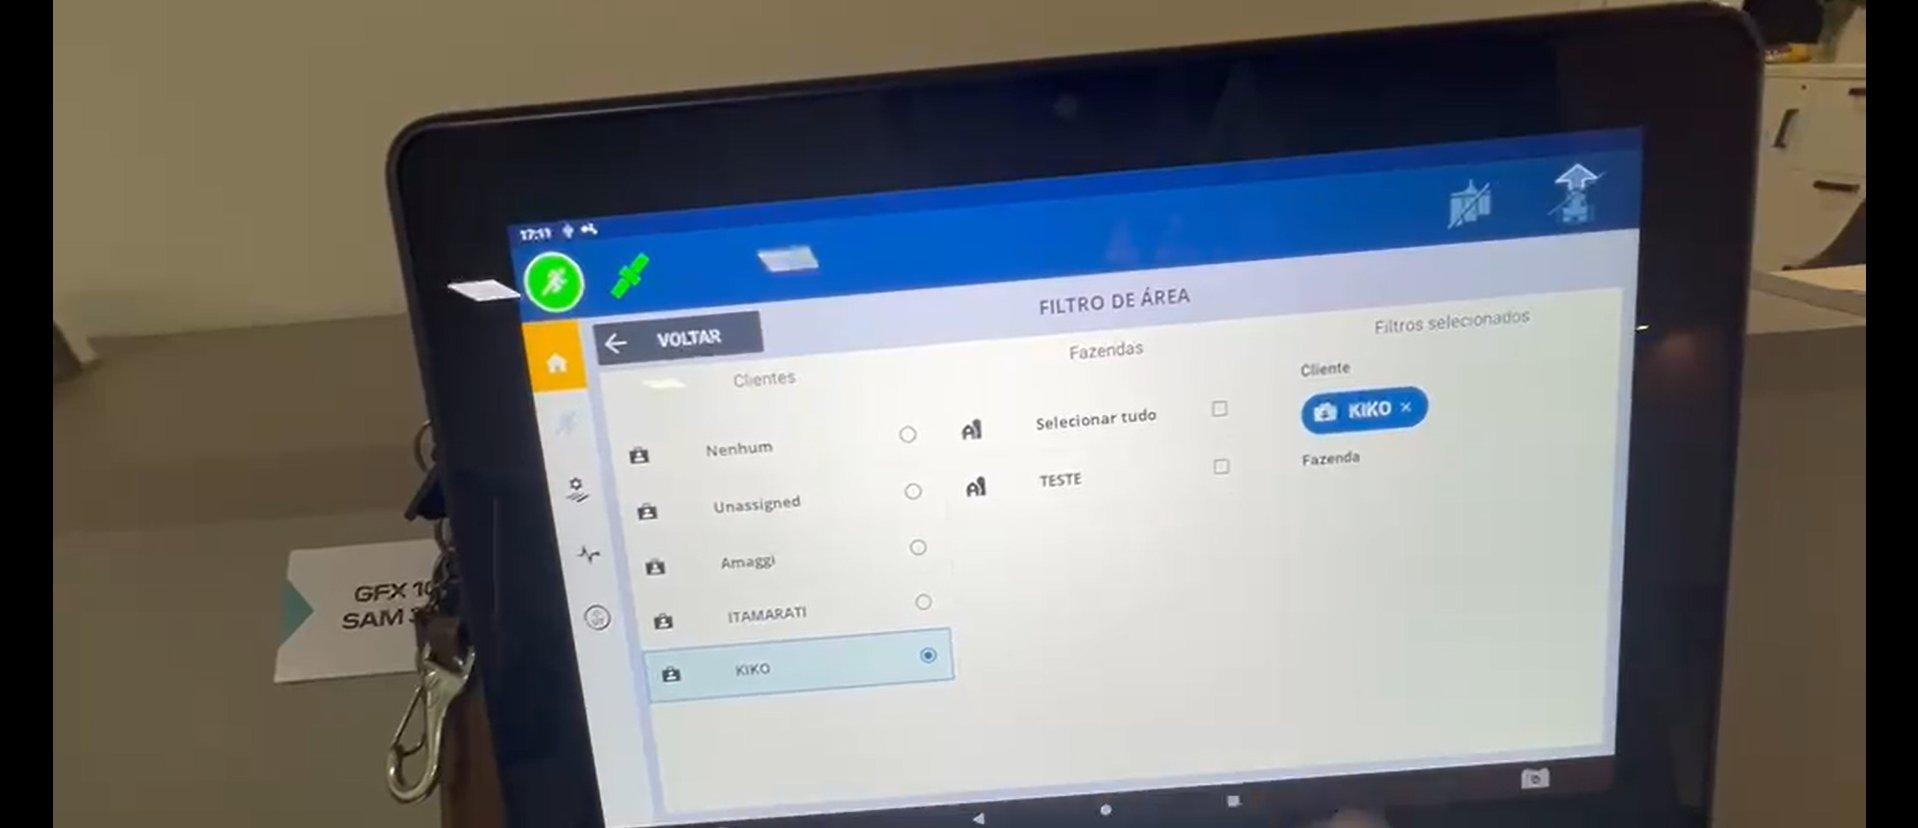
Select the farm in the Area Filter. The Area Filter screen opens. Under Clients, select the client you want (for example, KIKO).
-
Confirm the farm selection. After you pick the client, the farm appears. Confirm your choice in the Selected filters panel.
-
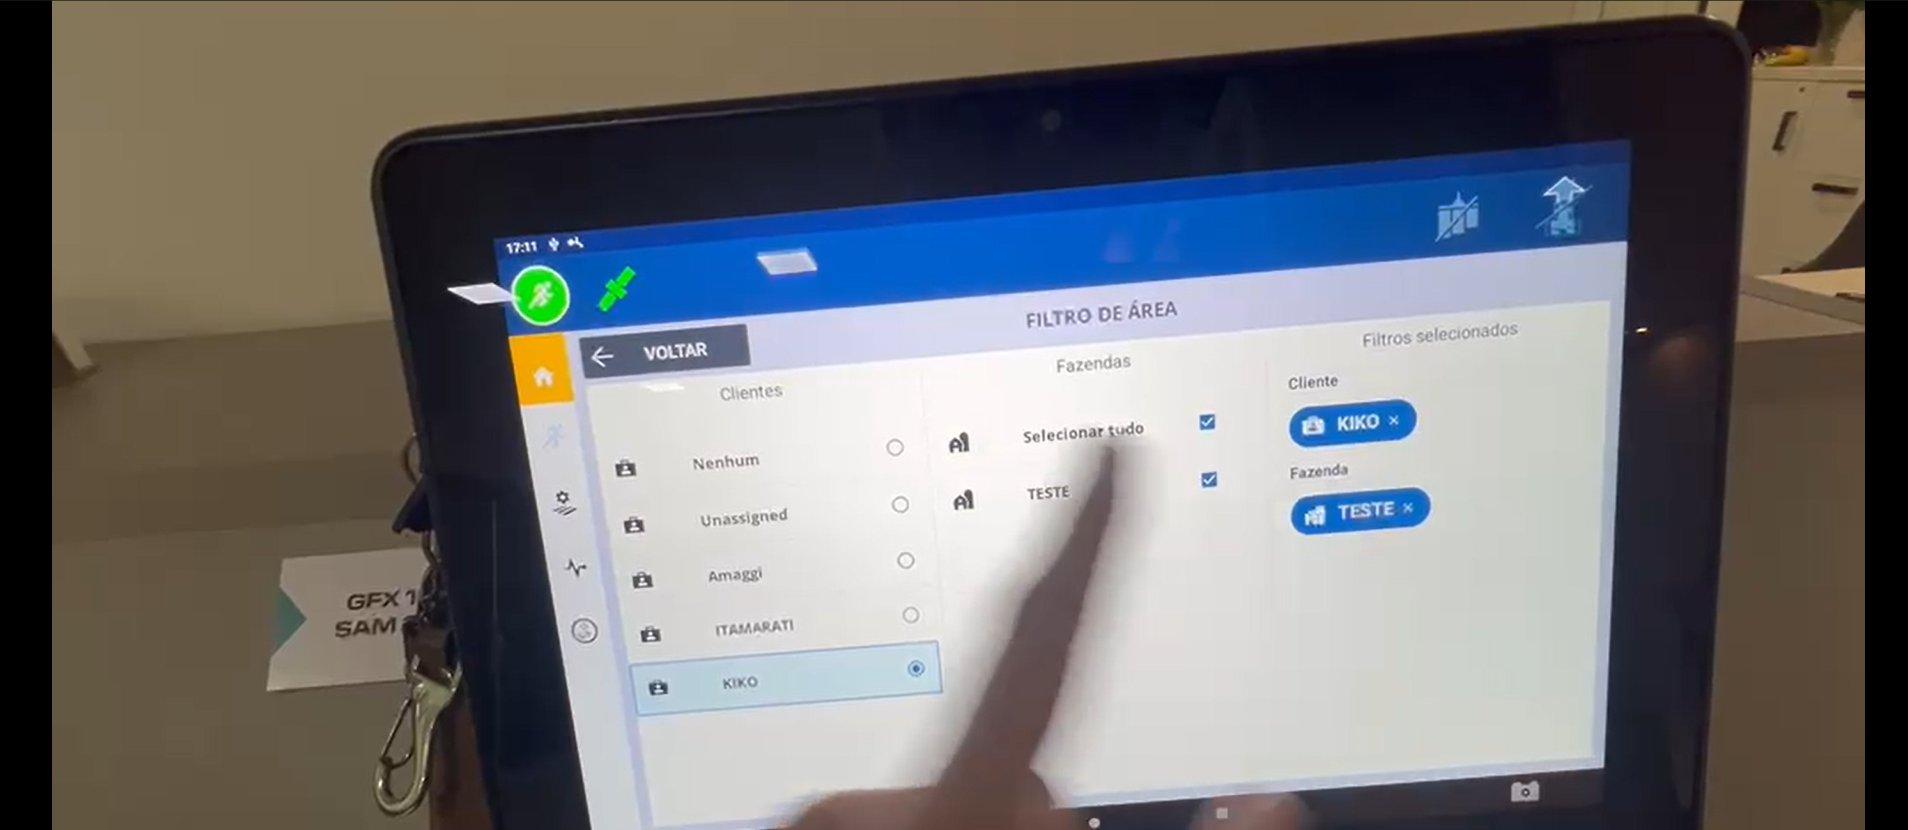
Select all and tap Back. In the Farms column, tap Select all, then tap BACK to apply the filter.
-
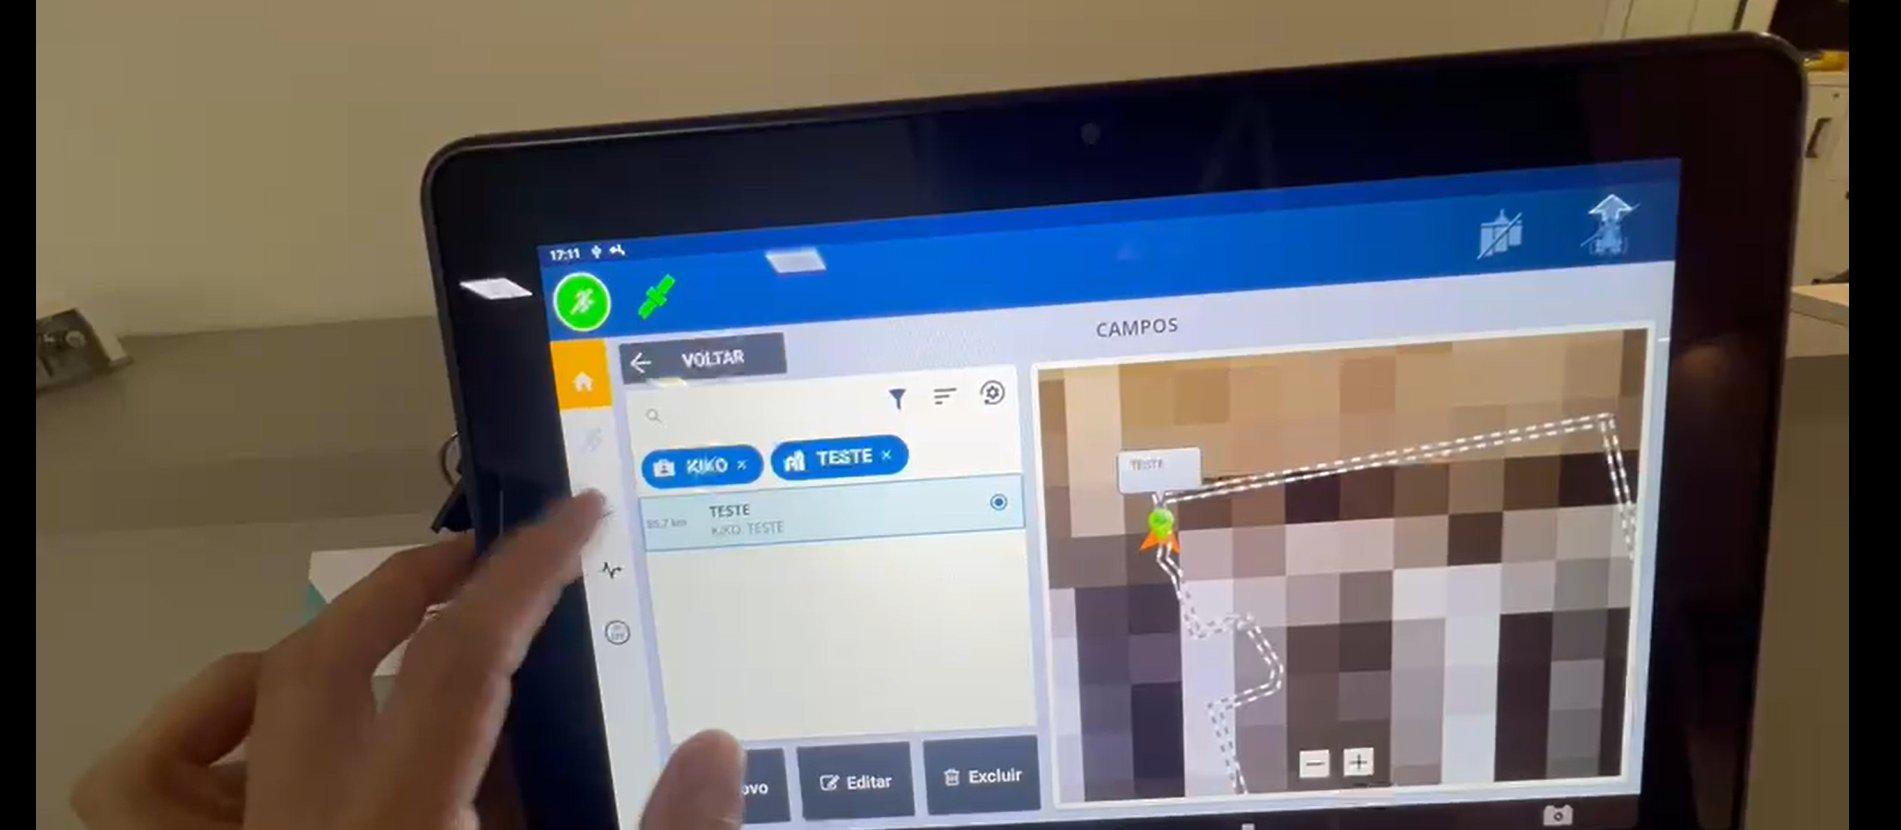
Find the field in the Fields list. The field list shows with the filter applied. Locate and select the field you want (for example, TESTE).
View and activate the Path Plan
-
The plan appears on screen. The map of the selected field is shown. Confirm the field boundary looks correct on the map.
-
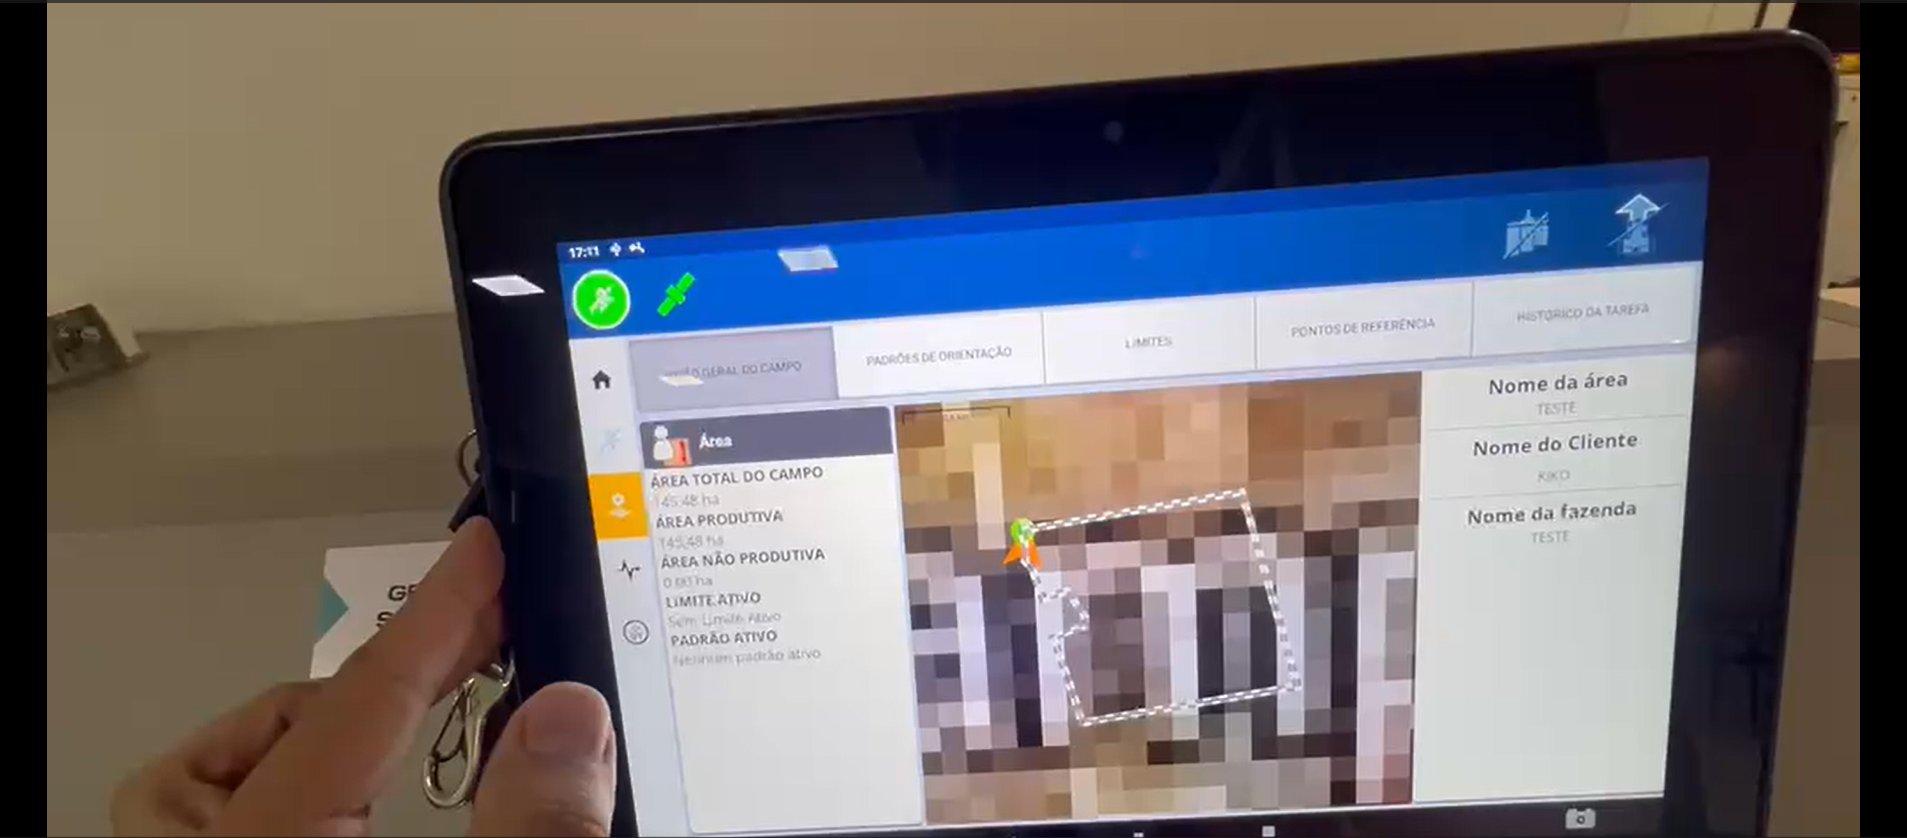
Field overview. Open the Field Overview tab and check Total Area, Productive Area, and the rest of the field information.
-
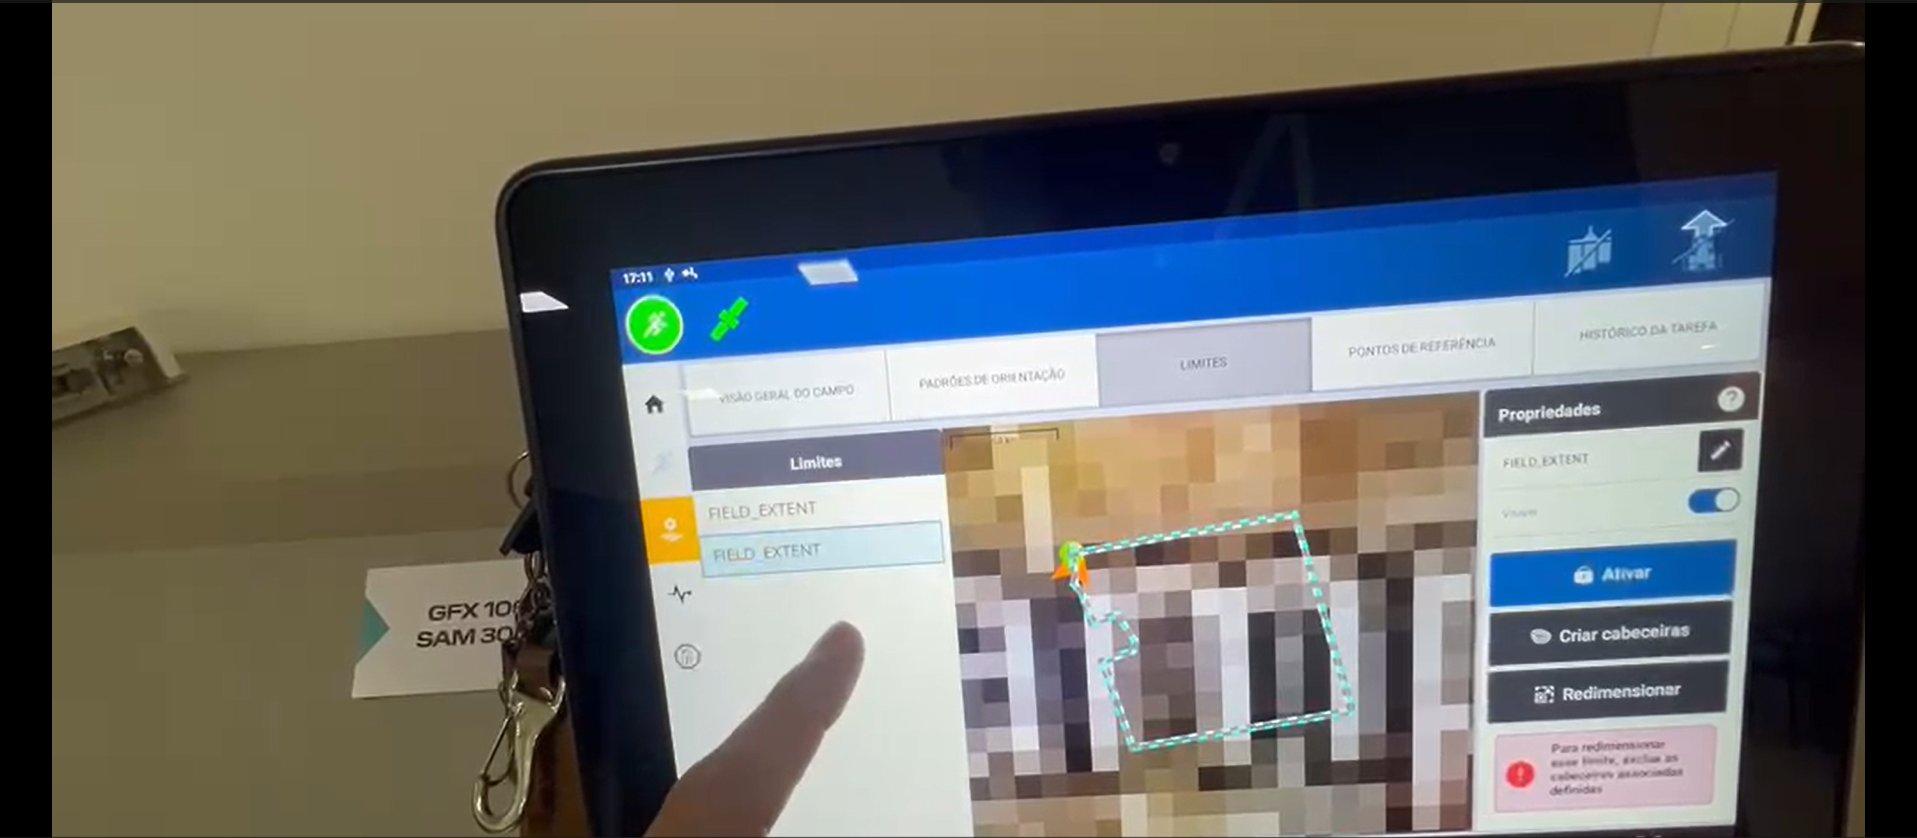
Tap Boundaries to see outer and inner boundaries. Open the Boundaries tab, review the available FIELD_EXTENT boundaries, and select the one you want.
-
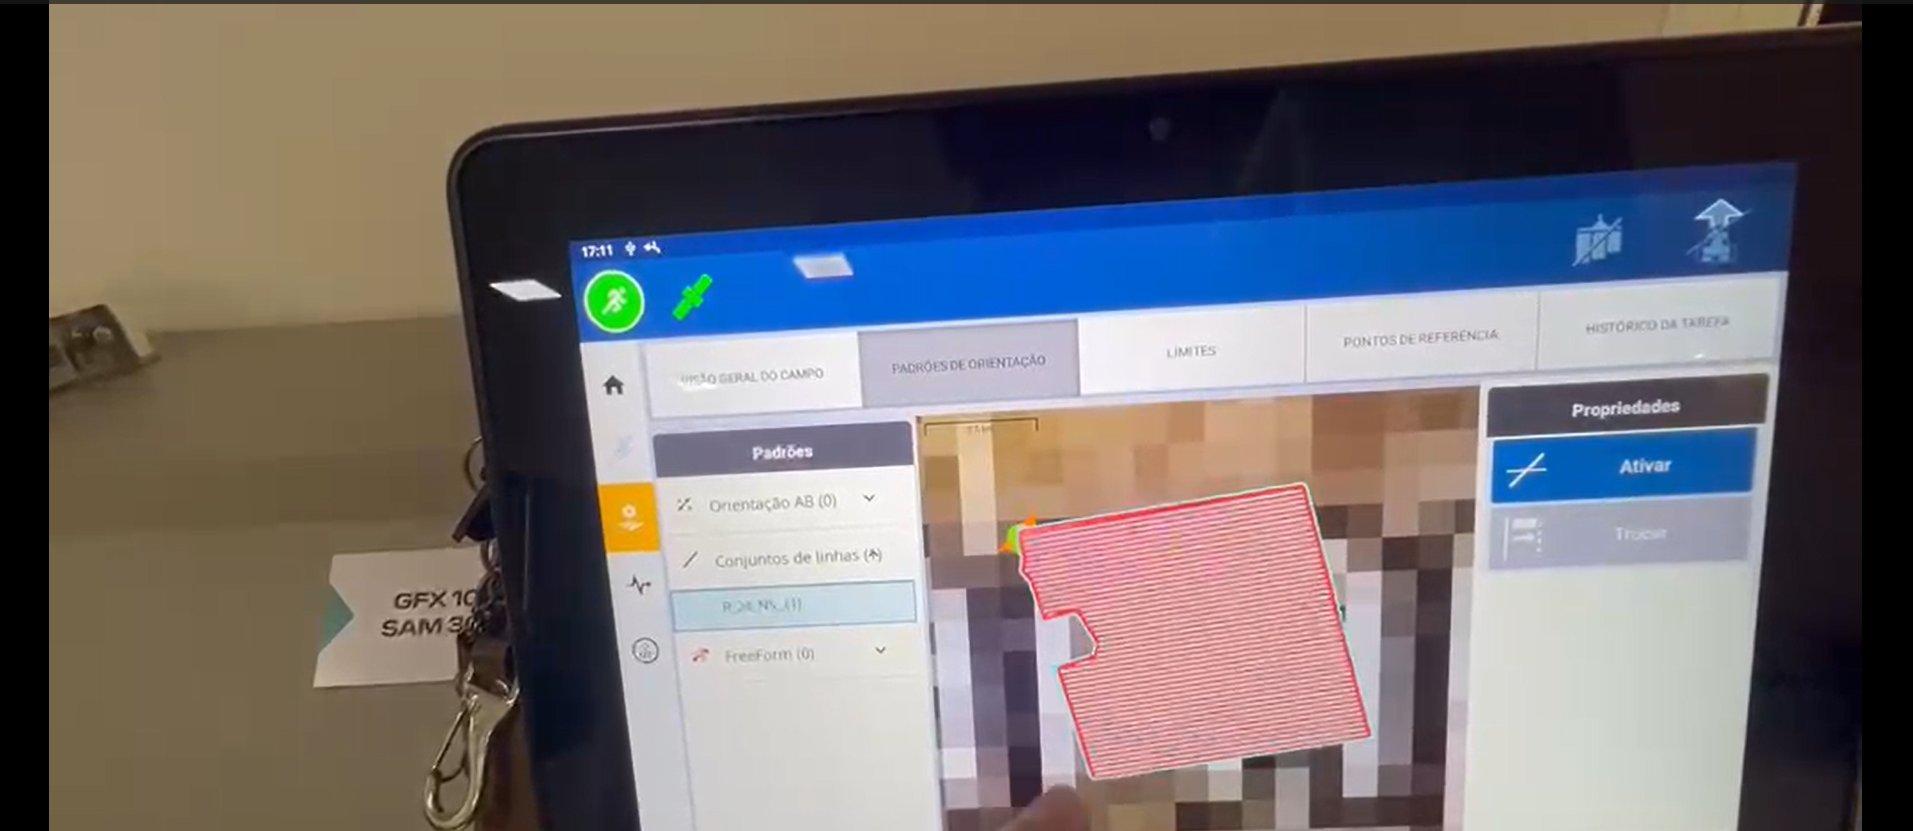
Guidance Patterns: tap Activate. Open the Guidance Patterns tab, select the Path Plan's line set, and tap ACTIVATE. The passes are now ready for navigation.

Guide produced in partnership with Kiko Tecnologia.