Every user on Launch Pad may purchase planning credits. Each time the "Create Path Plan" button is clicked, a credit is automatically deducted.
In other words, each credit corresponds to the creation of a Path Plan on Launch Pad. This Planning Session spans all adjustments for a field boundary, and an operation.
1 credit = 1 operation for a field.

How to acquire credits?
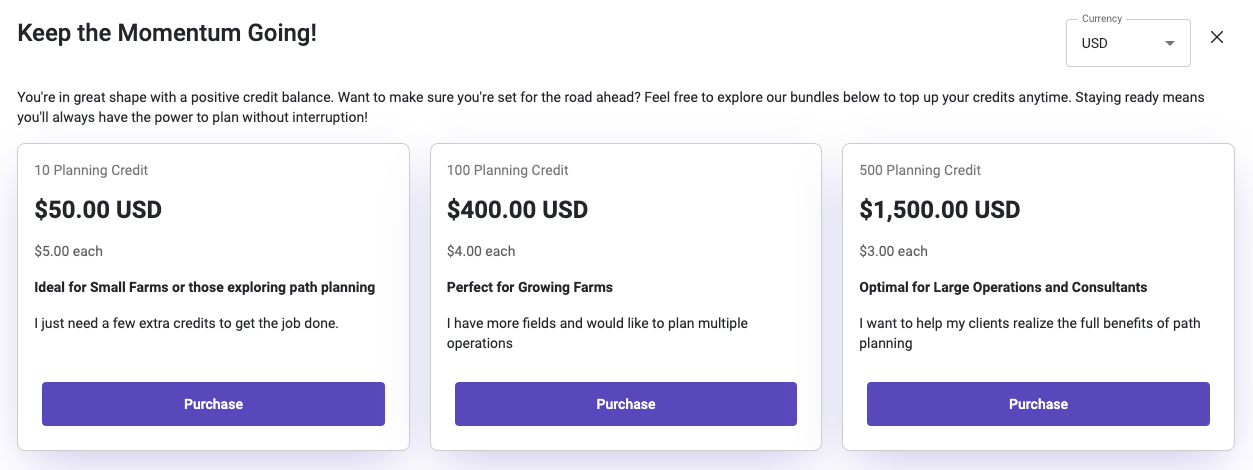
To view the available credit packages and purchase the desired amount, click the "Buy" button, located on the left sidebar of the screen in Launch Pad.
Next, you will see the three available packages and their respective prices.
Choose the package that best fits your needs!
When you click the "Purchase" button for any selected package, you will be redirected to a screen where you can adjust the number of credits desired.
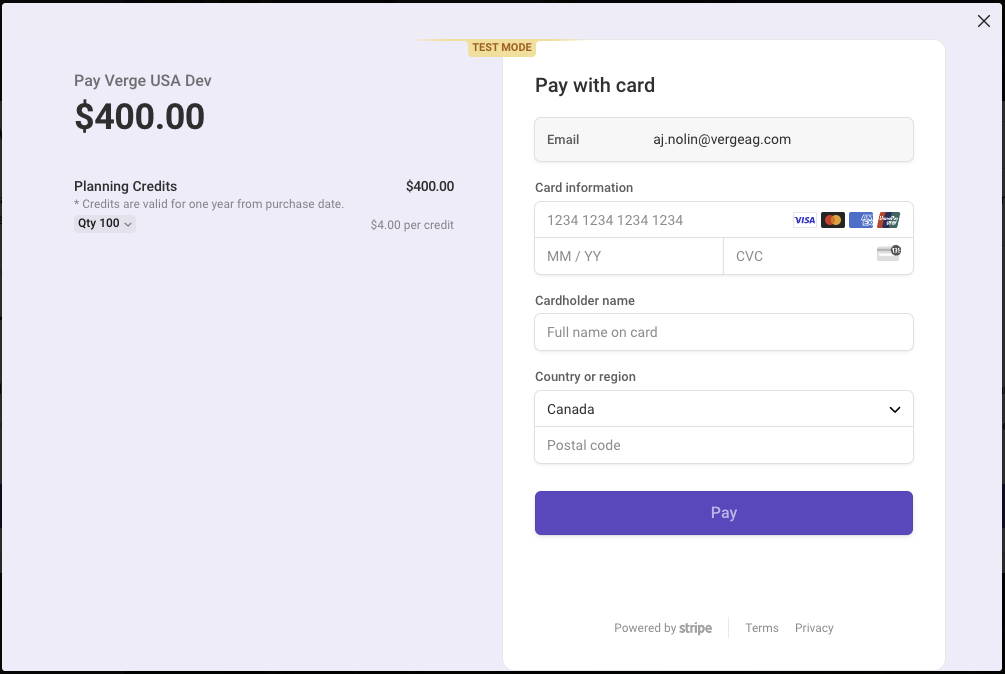
After selecting the desired amount of credits, verify the total cost, enter your credit card details, and enjoy all the features of Launch Pad!
Credit consumption
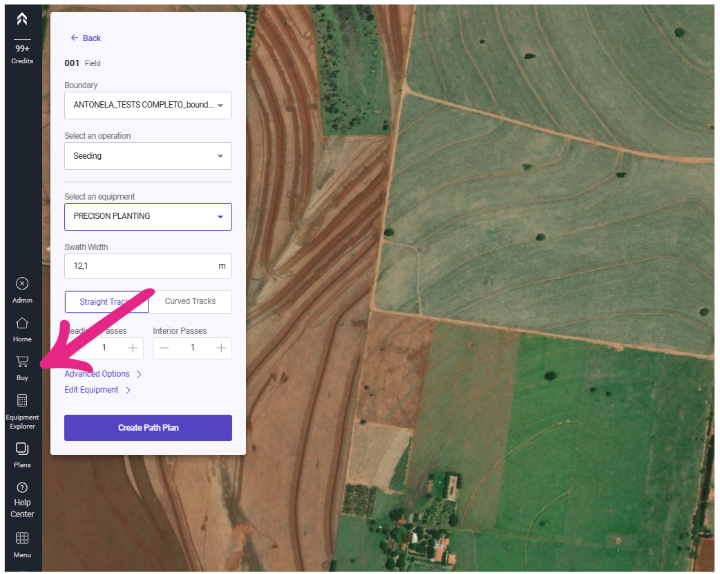
When creating a Path Plan, you will see a dividing line on the parameter entry screen. The fields above this line consume credits when filled out or used. Fields below the line can be modified during the Path Plan creation process without consuming extra credits.
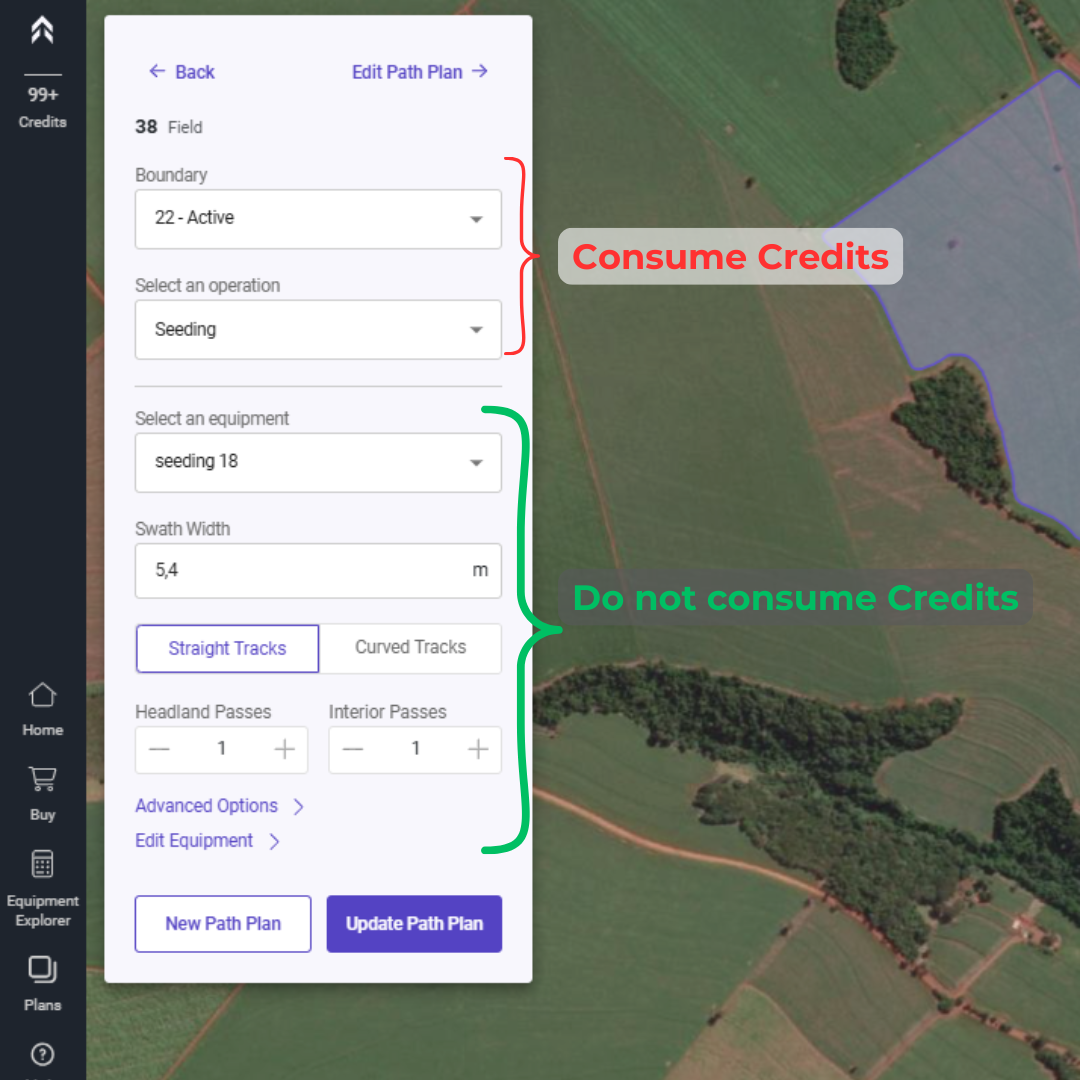
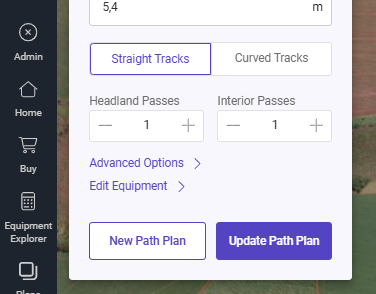
After clicking the "Create Path Plan" button, a credit will be deducted, and you will enter the "Planning Session". As long as you keep the browser open, you can click "Edit Inputs" to adjust details like equipment, width, Headlands, or Advanced oOptions.

After making the desired changes, simply click "Update Path Plan" to apply the modifications.
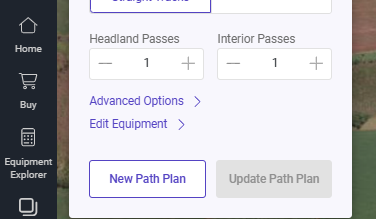
⚠️Reminder: If you change the field limit or operation, the "Update Path Plan" option will be disabled. In this case, if you click "New Path Plan", a new credit will be consumed.
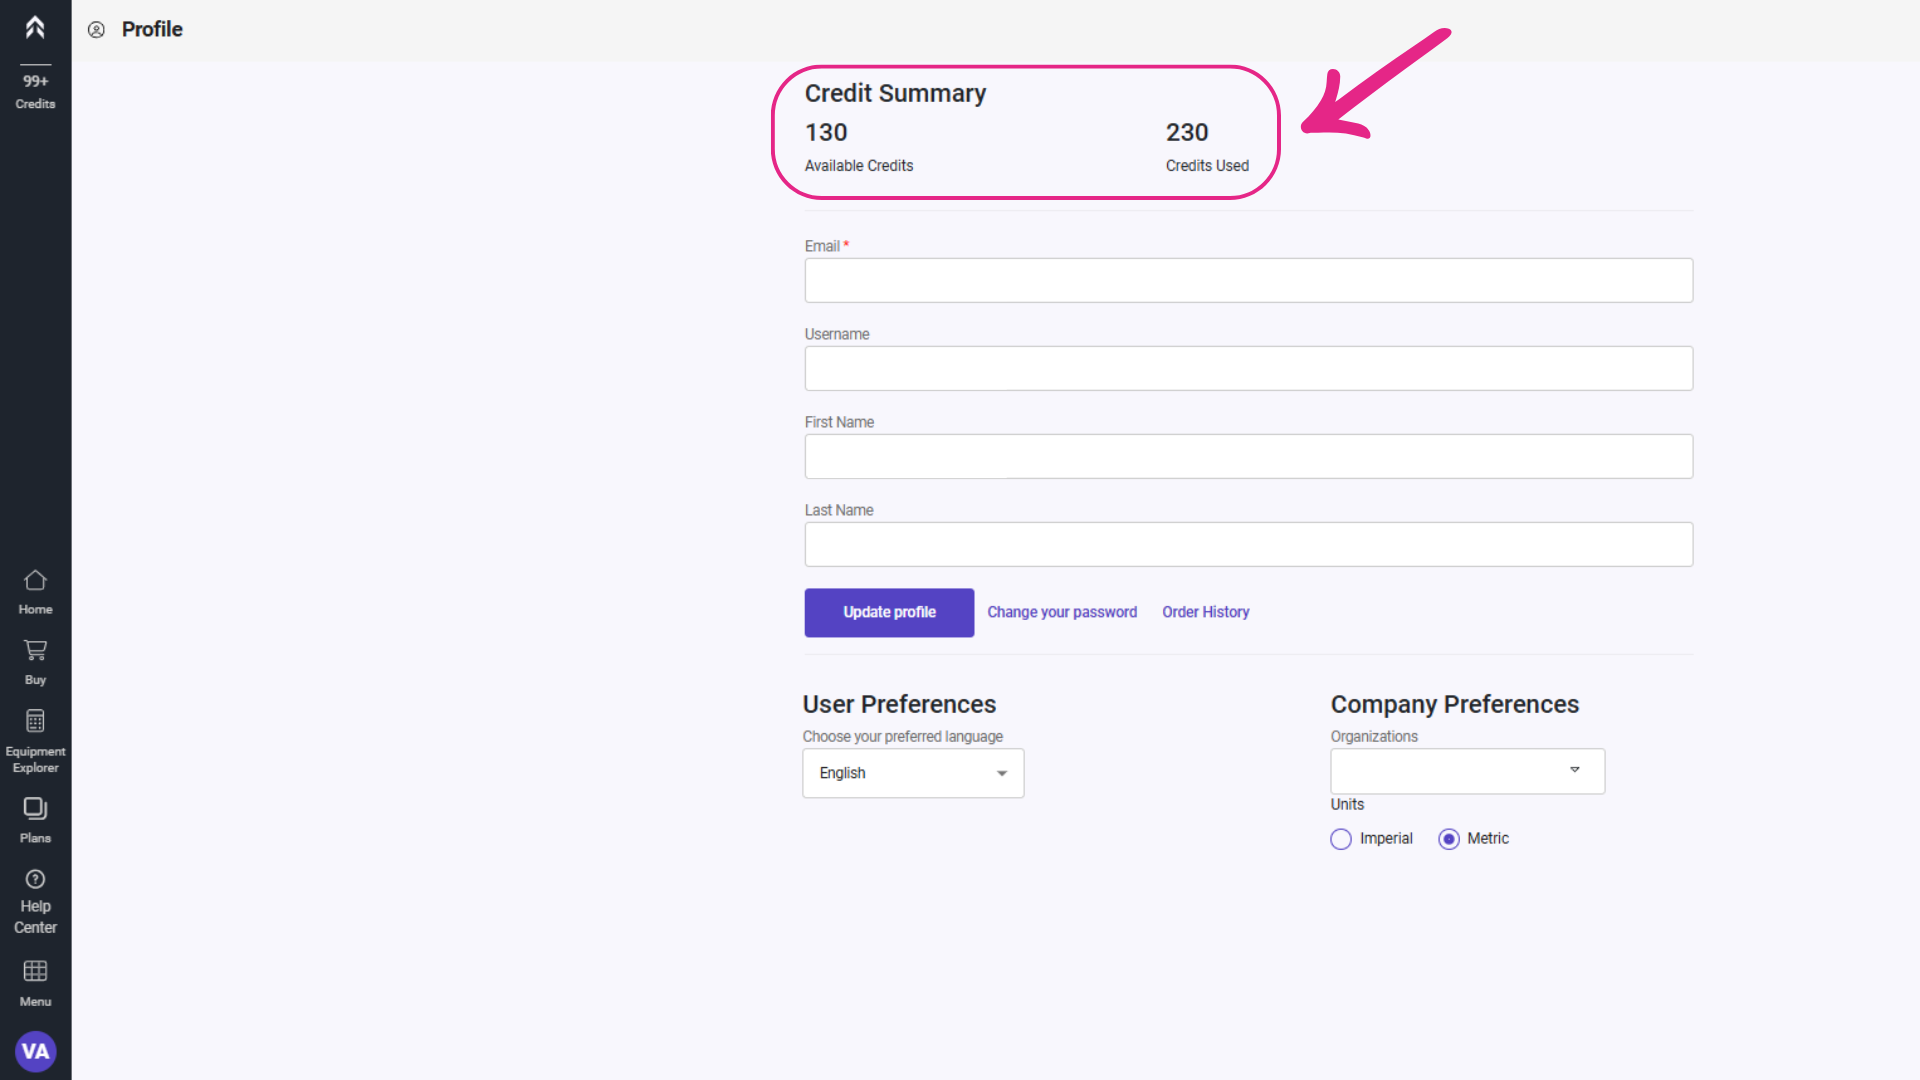
Credit summary (user profile)
There are two places where a user can view their credit balance. The most visible is the credit icon available in the left navigation.
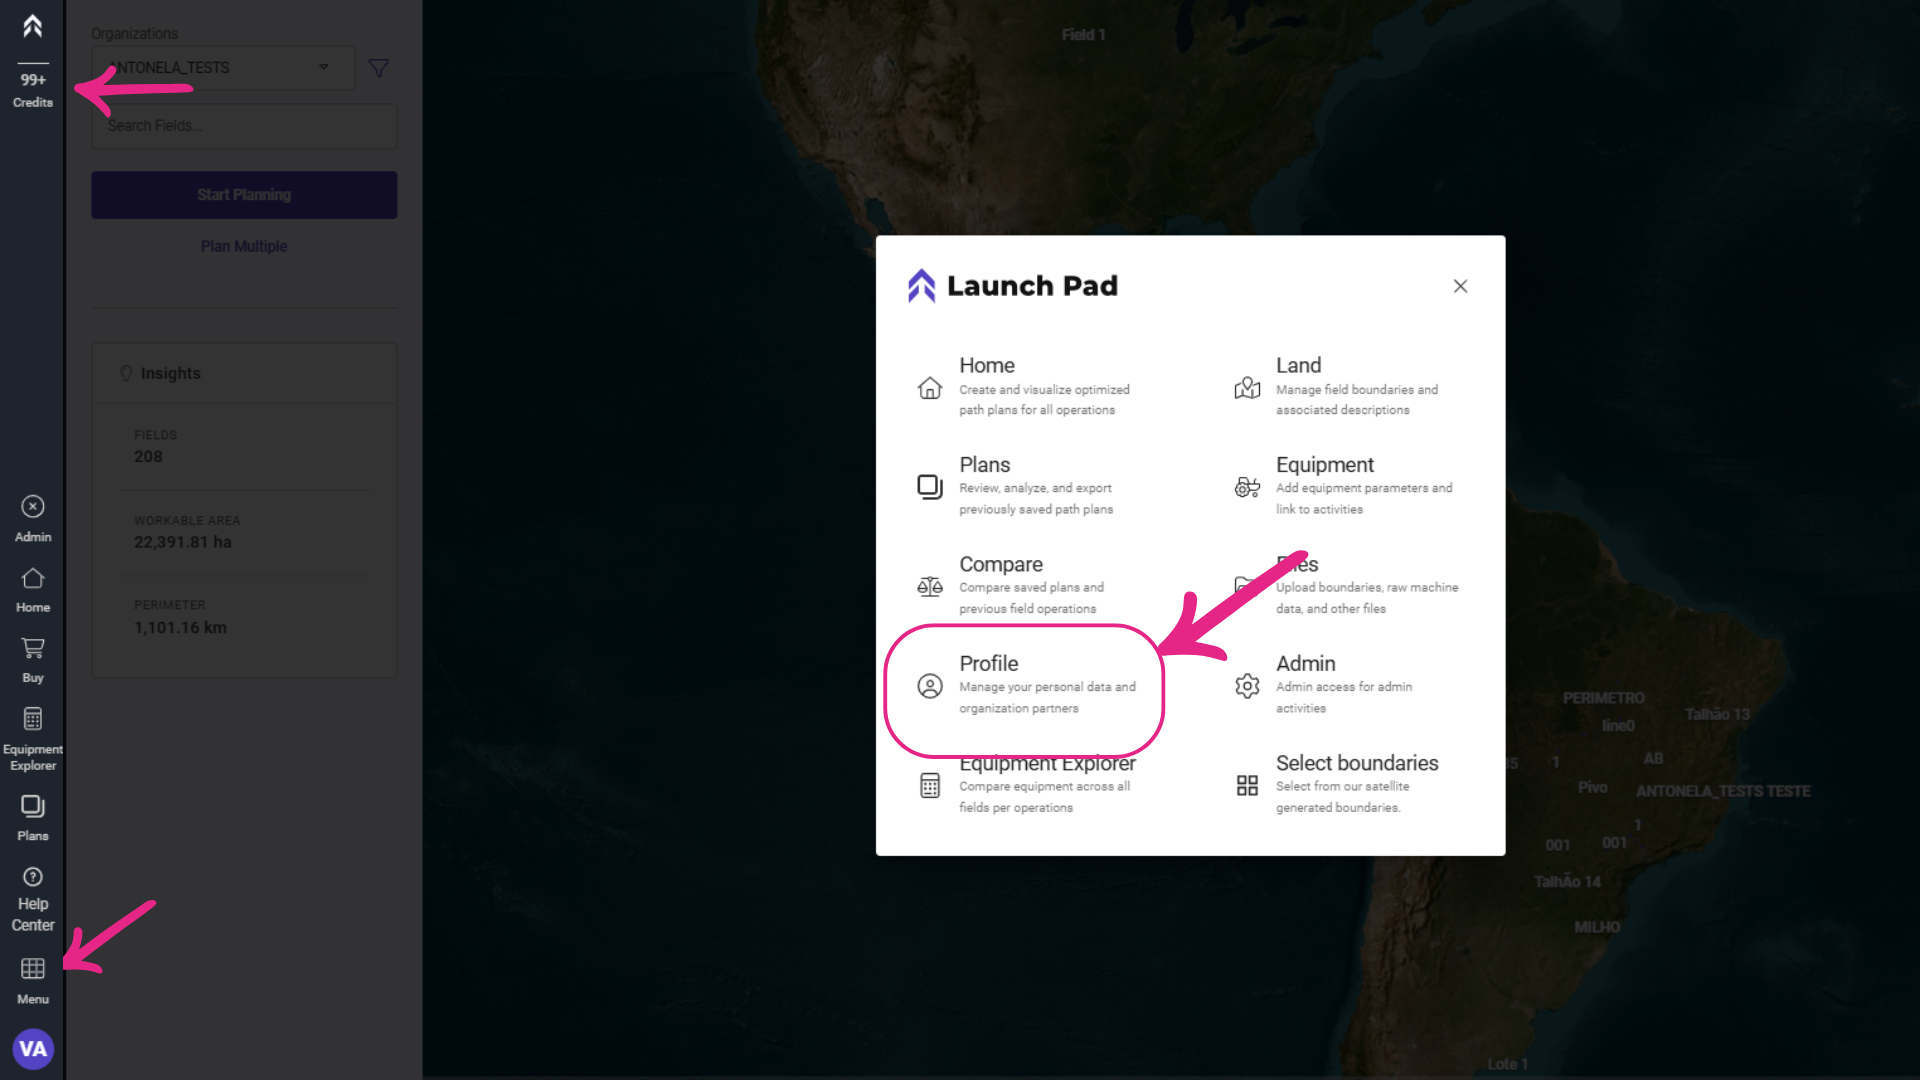
The other is under the user profile. Here, the user can see their available credits and the total number of credits they have used over time.
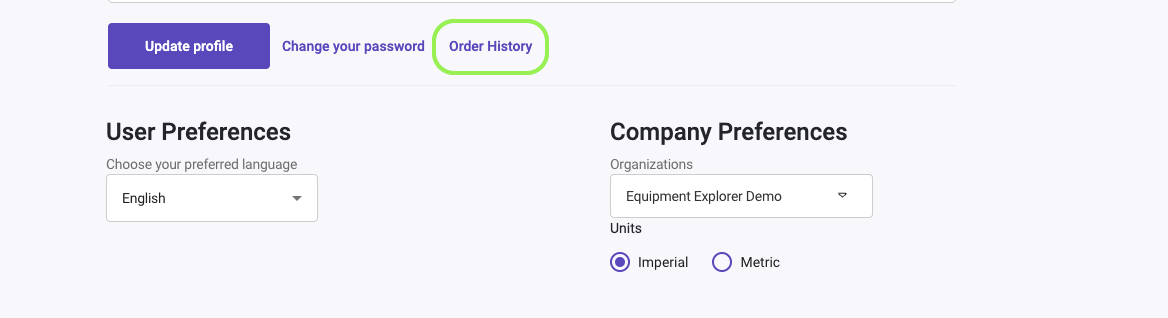
Order History - User Profile
To provide transparency, each transaction that results in a positive or negative change to an account’s balance is recorded in the order history. On the user profile, next to the link to change the password, there’s a link to view the user's Order History.
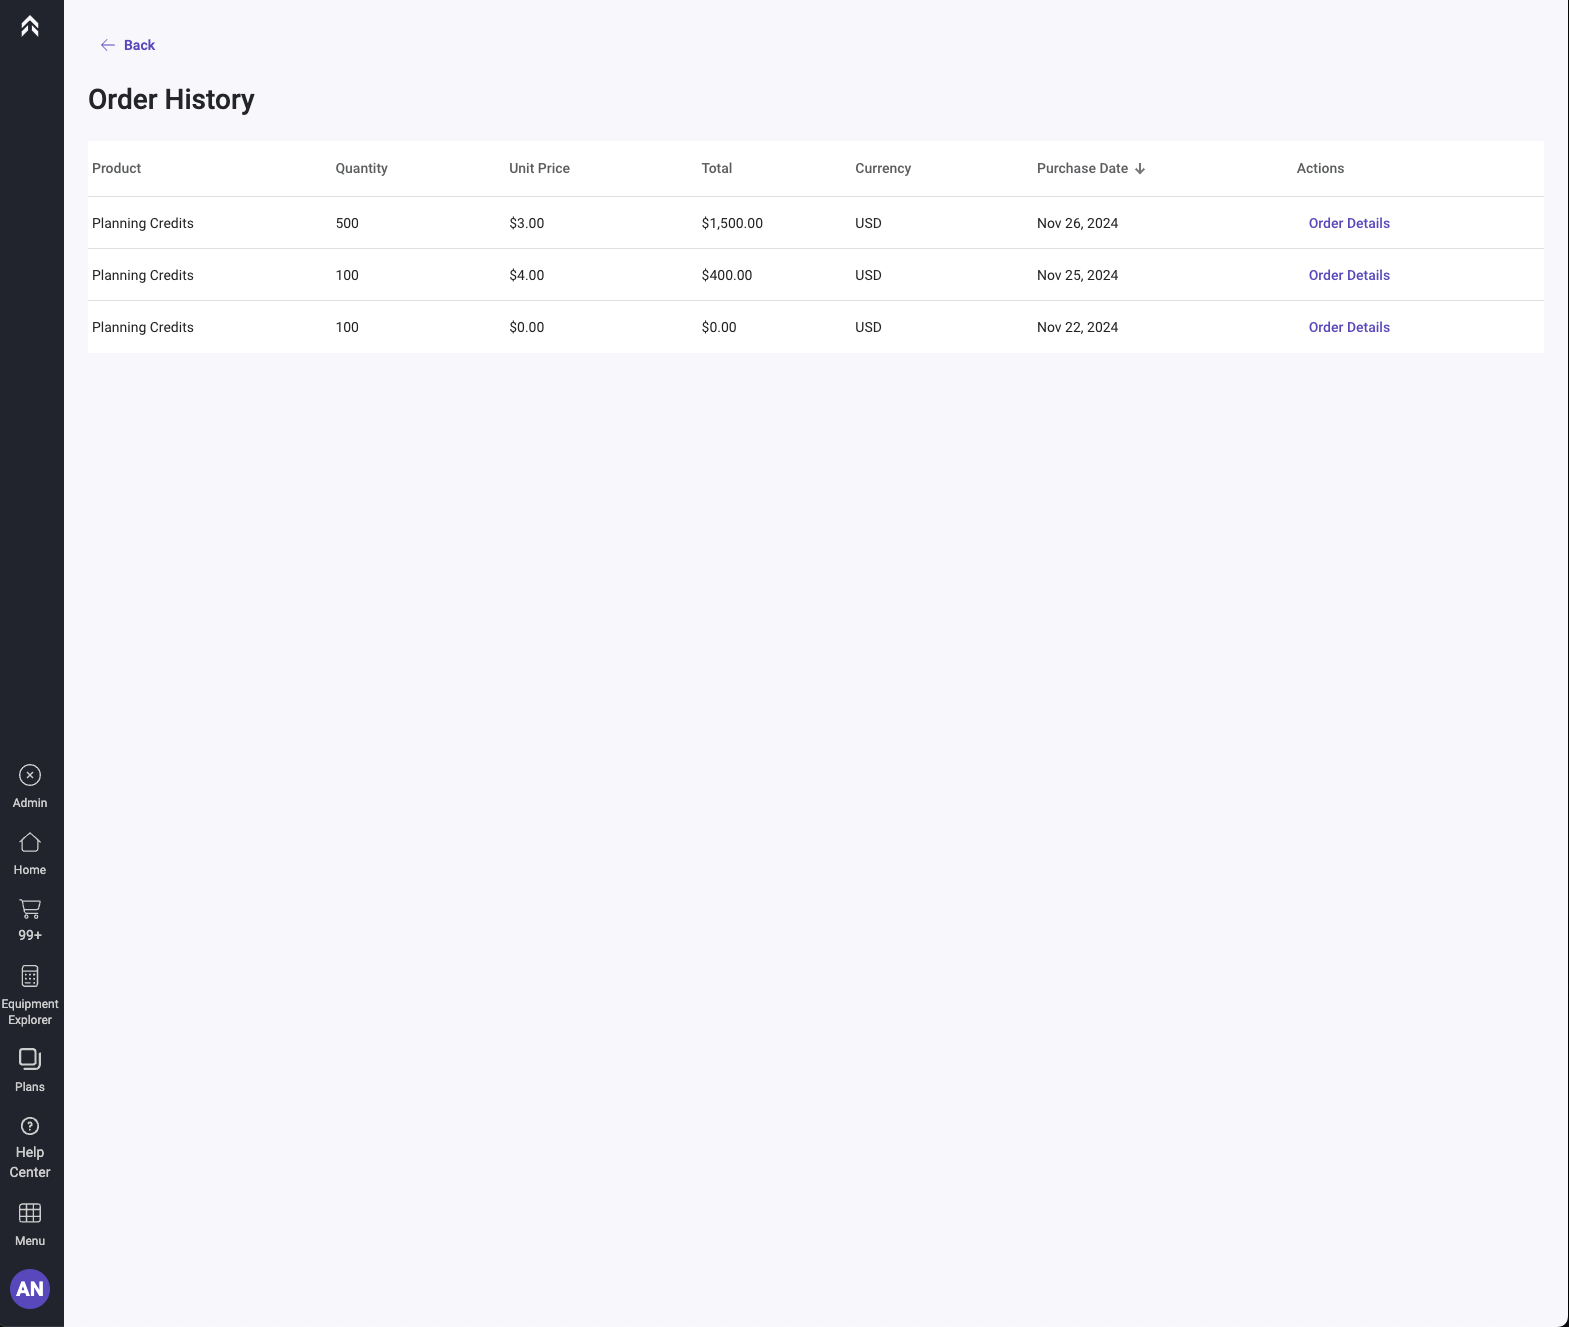
The user's order history will look like this:
By clicking on the order details, the user will see the following:
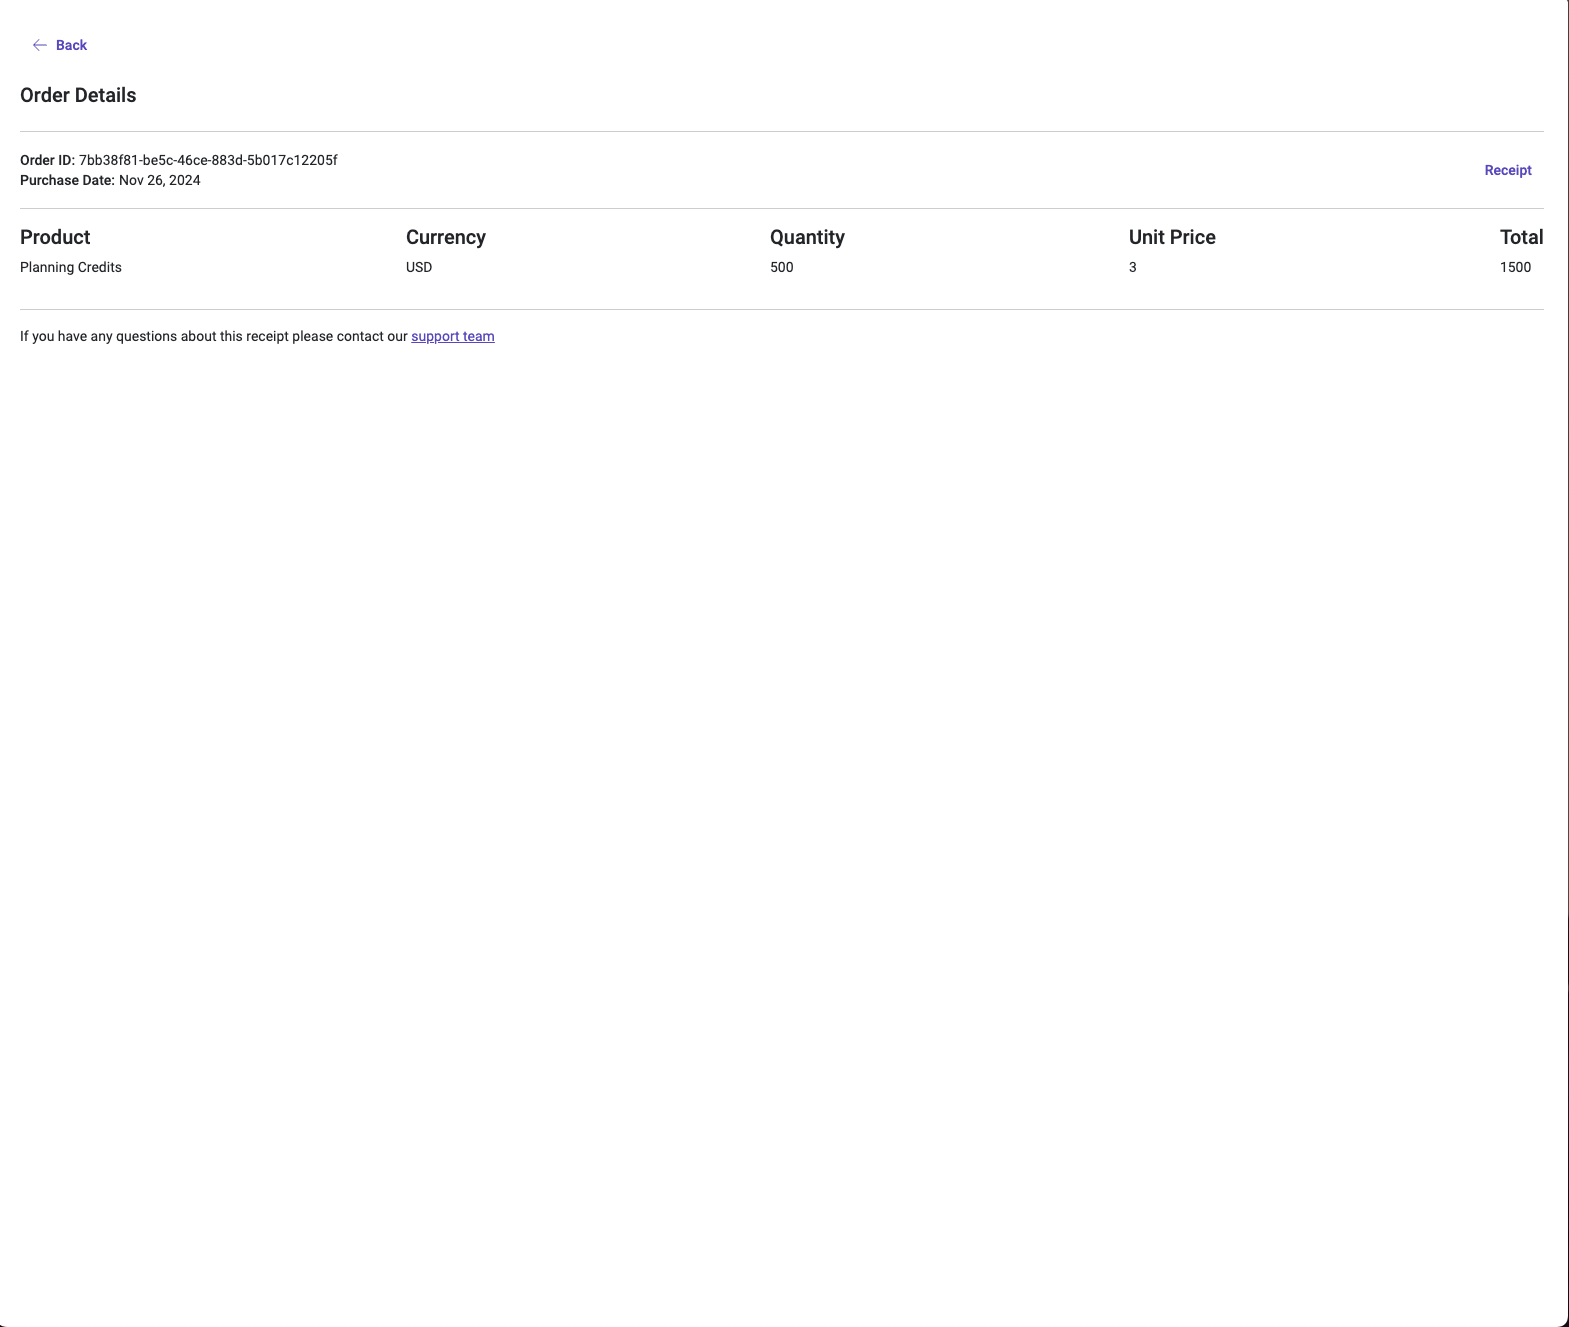
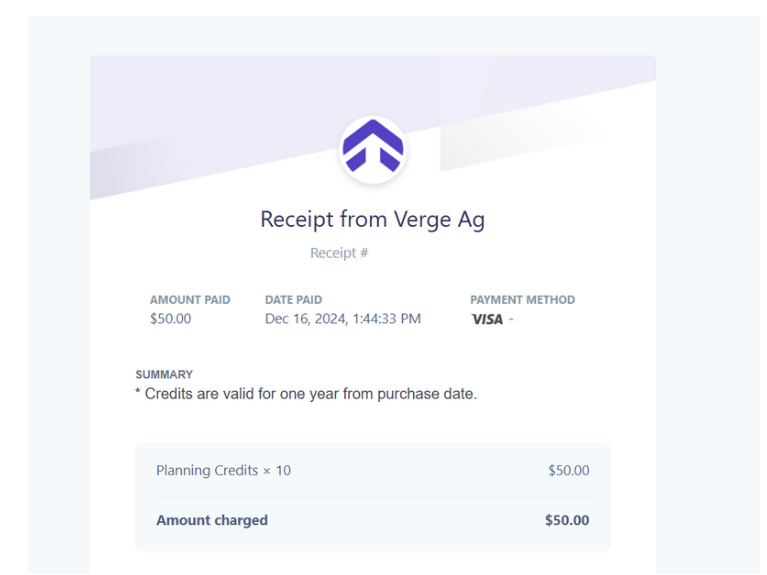
Receipt
The order details also give the user an opportunity to view the receipt generated by Stripe, which would have been emailed to them at the time of purchase.